


Device Connection ColorQube™ 9201/9202/9203
2-4 System Administrator Guide
To access the Welcome Page or Properties tab of Internet Services, TCP/IP and HTTP must be enabled on the
device as described in the Introduction on page 1-1 of this guide.
Complete the Installation Wizard
If this is the first time the device has been powered on, the Installation Wizard will run. If this screen does
not appear, proceed to Network Connectivity in this chapter.
1. At the Installation Wizard screen, touch [Next].
2. Verify the Customer Support Telephone number, or input the correct entry by touching the box and
entering the number by pressing the numbers on the keypad. Touch [Next].
3. Set the date format required. Touch [Next].
4. Set the date by touching the buttons and pressing the numbers on the keypad. Touch [Next].
5. Set the clock format. Touch [Next].
6. Set the time, touch [Next].
7. Set the Greenwich Meantime Offset according to the country you are in. Touch [Next].
8. A screen will appear to indicate that you have successfully completed the Xerox Installation Wizard.
To uc h [Finish]. The device will save the settings and reboot. If enabled a configuration report will print.
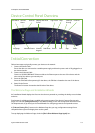
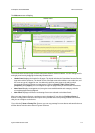
Administrator Access
The <Log In/Out> button provides access to the Administrator Tools area. Administrator access is required to
change settings such as network information on the device.
1. Press the <Log In/Out> button on the Control Panel.
2. Enter the Administrator’s User Name [admin], touch [Next], enter the Password [1111], then touch
[Enter].
3. Press the <Machine Status> button.
4. Touch the [Tools] tab.
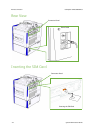
Print a Configuration Report to Verify Current Device Settings
Note
A Configuration Report should have printed when the device was powered off, then on, during Power
Cable and Ethernet Cable installation. If necessary, perform the following steps:
1. Press the <Machine Status> button on the device.
2. Touch the [Machine Information] tab.
3. Touch [Information Pages].
4. Touch [Configuration Report].
5. Touch [Print], then touch [Close].