


ColorQube™ 9201/9202/9203 E-mail
System Administrator Guide 13-3
20. For Login Credentials, if the mail account does not need password access, select the [None] radio
button.
21. If the mail account does require a password, select the [System] radio button, then enter the SMTP
Server account name and password, where shown.
22. If prompted, enter the Administrator User ID and Password. The default is [admin] and [1111], and
click on [Login].
23. Click on the [Apply] button to implement any changes.
Configure General E-mail Settings
24. Click on the [Services] link.
25. Click on the [E-mail] link.
26. Select [Defaults] in the directory tree.
General
1. In the General area, click on the [Edit] button.
2. To change the e-mail [From Address], enter a valid e-mail address.
3. Optional Step: Enter a [From Name].
4. If LDAP is configured, select the required option next to the [Allow Authenticated Users to Edit “From”
Field when]:
– [Address Book (LDAP) Search Successful] - Users can edit the 'From' field when the LDAP server
finds the user's address.
– [Address Book (LDAP) Search Failure] - Users can edit the 'From' field when the LDAP server did
not find the user's address.
– [Address Book (LDAP) Search Not Performed] - Users can edit the 'From' field when the LDAP
server has not been accessed.
5. Click on [Yes] next to [Edit “From:” Field when Authentication is not Required] if users can edit the
'From' field when authentication is not enabled on the device.
6. In the [Message Body] section, enter text that you want to appear as default in the body of e-mails sent
from the device.
7. In the [Signature] entry box enter text that you want to appear as the default signature in every e-mail.
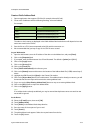
8. Select an option from the [Confirmation Sheet] drop-down menu:
– [Off] - This setting will not produce a Confirmation Sheet.
– [On] - This setting will produce a Confirmation Sheet that will provide error information and
indication that the job has reached the recipient(s).
– [On Errors Only] - This setting will produce a Confirmation Sheet only when error information is
indicated.
9. Check the [Enable] box for Auto Send to Self, if you wish to add a copy of the sender’s e-mail to the
Address List.
10. The Enable E-mail Security feature provides enhanced security when sending e-mail messages and
attachments. This feature utilizes the authentication options of the device, along with an optional
secure e-mail server, to protect data transmitted as e-mail.
11. Click on the [Apply] button to implement changes and return to the Default page.