14-8
Cisco ASA 5500 Series Configuration Guide using ASDM
Chapter 14 Completing Interface Configuration (Routed Mode)
Completing Interface Configuration in Routed Mode
Step 4 In the Security level field, enter a level between 0 (lowest) and 100 (highest).
See the “Security Levels” section on page 14-1 for more information.
Step 5 (Optional; not supported for redundant interfaces) To set this interface as a management-only interface,
check the Dedicate this interface to management-only check box.
Through traffic is not accepted on a management-only interface. For the ASA 5510 and higher, see the
“Prerequisites” section on page 14-7 for more information.
(ASA 5512-X through ASA 5555-X) You cannot disable this option on the Management 0/0 interface.
Note The Channel Group field is read-only and indicates if the interface is part of an EtherChannel.
Step 6 If the interface is not already enabled, check the Enable Interface check box.
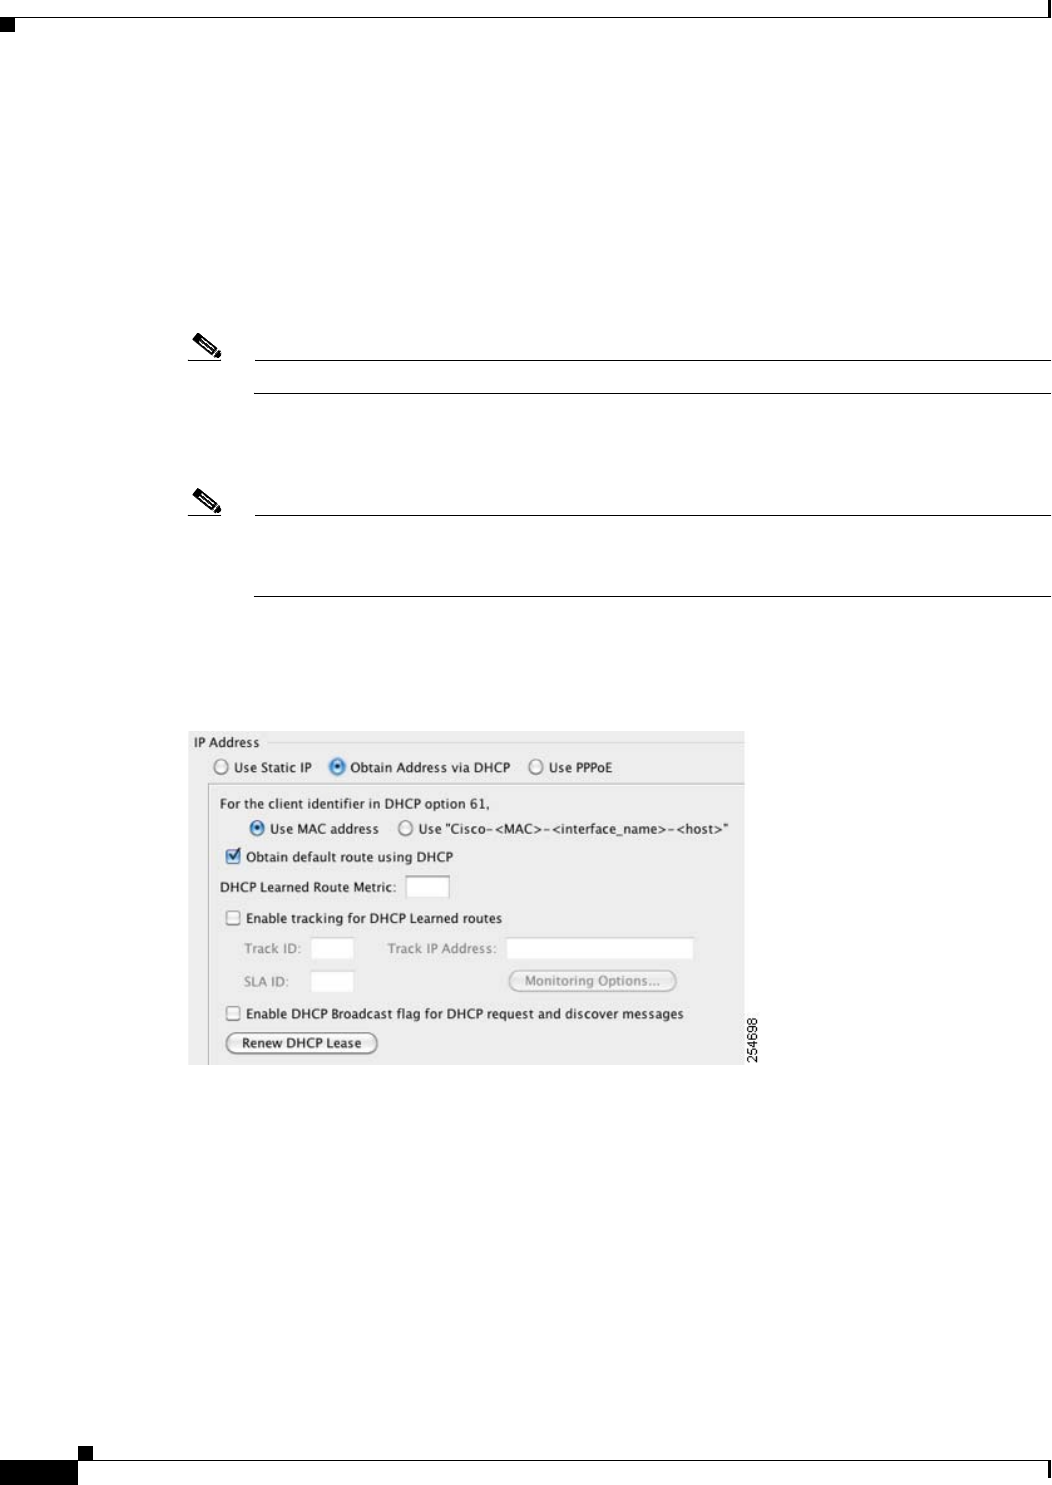
Step 7 To set the IP address, one of the following options.
Note For use with failover, you must set the IP address and standby address manually; DHCP and
PPPoE are not supported. Set the standby IP addresses on the Configuration > Device
Management > High Availability > Failover > Interfaces tab.
• To set the IP address manually, click the Use Static IP radio button and enter the IP address and
mask.
• To obtain an IP address from a DHCP server, click the Obtain Address via DHCP radio button.
a. To force a MAC address to be stored inside a DHCP request packet for option 61, click the Use
MAC Address radio button.
Some ISPs expect option 61 to be the interface MAC address. If the MAC address is not
included in the DHCP request packet, then an IP address will not be assigned.
b. To use a generated string for option 61, click Use
“Cisco-<MAC>-<interface_name>-<host>”.
c. (Optional) To obtain the default route from the DHCP server, check Obtain Default Route
Using DHCP.
