


5-121
Cisco MGX 8800/8900 Series Hardware Installation Guide
Releases 2 - 5.2, Part Number OL-4545-01, Rev. H0, May 2006
Chapter 5 Installing the Cisco MGX Switch or Gateway
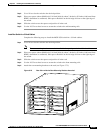
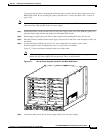
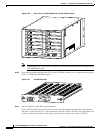
Installing the MGX 8830 or MGX 8830/B Switch
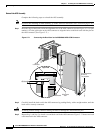
Step 2 Use a lift to raise the switch to the desired position.
Step 3 Place two spacers (about 0.060 inch [1/16 inch] thick by about 2 inches by 30 inches, fabricated from
HDPE, aluminium or cardboard). One spacer should be on the left edge and one on the right edge of
the switch.
Step 4 Slide the switch across the spacers and position it in the rack.
Step 5 Use the 10-32 truss head screws to secure the switch to the mid-mounting rails.
Install the Switch in a 19-Inch Cabinet
Complete the following steps to install the MGX 8830 switch in a 19-inch cabinet:
Step 1 Use a lift to raise the switch to the desired position.
Note The rear-mounting brackets cannot be installed before putting a unit in a 19-inch cabinet.
Step 2 Place two spacers (about 0.060 inch [1/16 inch] thick by about 2 inches by 30 inches, fabricated from
HDPE, aluminium or cardboard). One spacer should be on the left edge and one on the right edge of
the switch.
Step 3 Slide the switch across the spacers and position it in the rack.
Step 4 Use the 10-32 truss head screws to secure the switch to the front-mounting rails.
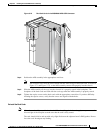
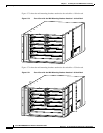
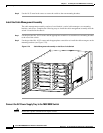
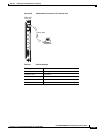
Step 5 Attach the rear-mounting brackets to the rack (see Figure 5-75).
Figure 5-75 Rear View with the Rear-Mounting Brackets Attached
17273