Chapter 4 - 6
Emulation mode, the server must have Bindery Context. Perform the following steps to
confirm the server has Bindery Context:
1. Go to the 4.x server and at the system console type: load install
2. Select Maintenance/Selective Install from the menu.
3. Select NCF Files Options from the menu.
4. Select Edit AUTOEXEC.NCF from the menu.
5. Search the file to see if you have a statement similar to the following included:
SET BINDERY CONTEXT=0U=ENG
Where =0U=ENG is an example of a name for the file server context. Use your own file server context in
place of =0U=ENG.
6. At the console prompt, type the SET BINDERY CONTEXT statement that you entered in
the AUTOEXEC.NCF file.
Note: The command at the console prompt takes effect immediately. The definition
in the file takes effect when the server is shut down and then restarted.
4.2.2 Configure in Bindery Mode with PCONSOLE
Once you confirm the server has Bindery Context, use the following procedures to configure
the Network Interface Board.
1. Log into the network as ADMIN.
2. Type PCONSOLE and press the ENTER key.
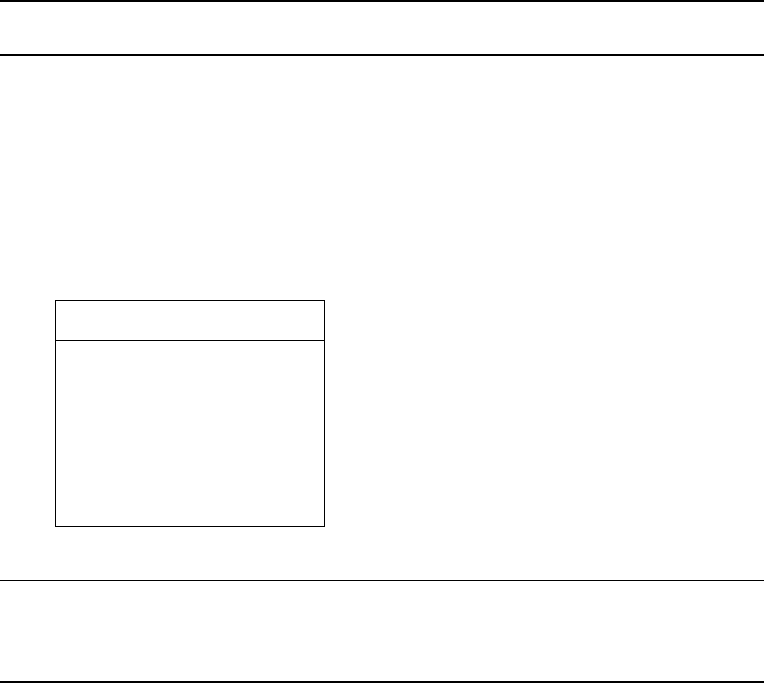
The following screen appears.
Available Options
Print Queues
Printers
Print Drivers
Quick Setup
Change Context
3. When the Available Options menu appears, press the F4 key (for the Bindery Mode).
Note: If you receive a message asking you to login to a server with Bindery
connections, the server you are attached to does not have Bindery Mode enabled.
Follow the procedures in 4.2.1. Confirm Bindery Context or log onto a server with
Bindery Services activated.
4. From the Available Options screen, select Quick Setup and press the ENTER key.
5. Use Quick Setup to connect your print server, print queue and printer correctly. You can
modify these later if you need to.
6. Select Print server and press the F8 key to modify the entry.


