4-74 Phaser 8400/8500/8550/8560 Color Printer Service Manual
General Troubleshooting
To obtain a trace:
1. Connect the serial cable to your PC. Serial port settings are 19.2 kbaud, 8
bits, no parity, 1 stop bit, and software control.
2. Turn off the printer.
3. Remove the rear panel to access the main board.
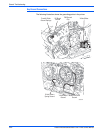
4. (8400 only) Connect the serial cable with adapter to the 5-pin connector
(labeled SER0) located above the RAM DIMM connectors. Pin 1 is the top
pin. The label THIS SIDE UP of the serial port adapter should face
towards the main board’s round back-up battery.
(8500/8550/8560 only) Connect the serial cable with adapter to the
service only port located above the USB cable port. The label THIS SIDE
UP on the serial adapter should face the rear of the printer.
5. Start up a terminal program, such as in window’s HyperTerminal (usually
located in Start ->Programs -> Accessories -> Communications ->
Hyper Terminal). Ensure the serial port settings, usually COM1: is
correct.
6. Turn on the printer.
The trace should appear in the terminal dialog window. Examine the trace to
troubleshoot the problem. If necessary, save the trace file to capture the text.
Obtaining a Back Channel Trace with USB to Serial Adapter
Many Laptops or PC’s do not include serial ports. An alternate method of
communicating with the printer is available by using a USB-to-Serial Port
Adapter. Use these steps to capture a back channel trace using a USB to
Serial adapter cable.
N
o
t
e
These instructions were developed using a Belkin USB-to-Serial Adapter,
P/N F5U109 and Windows XP. Other USB-to-Serial adapters are
available. However, software installation procedures may vary by brand.
Xerox is not responsible for any changes made to your Laptop or PC
setup to make the adapter software function properly.
1. Load the software from the CD and reboot the PC. Follow the instructions
included with your adapter to install the necessary software.
2. Connect the USB-to-Serial adapter to an available USB port on your PC.
Attach the port adapter to the 9 pin Serial cable (012-1535-00) and the
diagnostic pig tail (012-1543-00), and plug it into the printer’s service port.
3. Configure the USB port for diagnostics. For Windows XP, go to My
Computer -> Control Panel -> System, select the Hardware tab, and
then select Device Manager. Click on the “+” next to Ports (COM & LPT),
then right click on the USB-to-Serial Port device and select Properties.
Make a note of the port number (usually COM3 or COM4)
Note
Check the USB-to-Serial adapter instructions for acceptable ports.
Some adapters may require that the adapter use COM3 or COM4.
4. Click on the Port Settings tab. Set “Bits per second” to 19200, and set
“Flow control” to Hardware, then click OK.
5. Set up a Hyper Terminal port on the PC. Click Start ->Programs ->
Accessories -> Communications -> Hyper Terminal.


