6-10 Phaser 84000/8500/8550/8560 Color Printer Service Manual
Adjustments and Calibrations
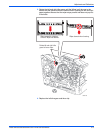
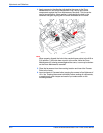
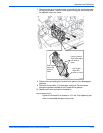
4. Apply pressure in the direction indicated by the arrow to the Drum
Maintenance Kit and Drum Maintenance Pivot Plate to force these
components against the Drum Maintenance Camshaft. This forces the
cam to home position. Home position is indicated by the hole in the
camshaft end gear aligning with the arrow embossed on the frame.
N
o
t
e
When properly aligned, the hole in the camshaft gear points to the 6:00 or
5:30 position. If the hole does not point at the arrow, while the Drum
Maintenance Kit is being pressed against the cams, a cam may be broken
on the Drum Maintenance camshaft.
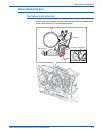
5. Clear the harnesses from the mounting location and insert the Process
Drive to the frame.
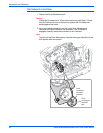
6. Insert and seat all 3 screws before torquing the screws to final tightness of
12 in. lbs. Torquing the screws individually before seating all components,
or applying too much torque can break or put undue strain on the
mounting bosses.
s8500-140


