


Phaser 84000/8500/8550/8560 Color Printer Service Manual 6-9
Adjustments and Calibrations
Timing the Drum Maintenance Camshaft
Caution
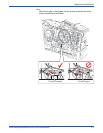
Use either the pins that come with replacement Process Drives, or a
paper clip, bent into a U shape to hold the gears in their proper position
during removal and replacement. If the Process Drive is incorrectly
installed, the printer could be damaged. See “Homing the Process Drive
Train” on page 6-8
.
The Process Drive screws are torqued to 12 in. lbs. Irreversible damage
to the chassis mounting bosses or the threads can result if screws are
over tightened.
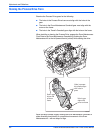
After replacing the Process Drive, Drum Maintenance Pivot Plate or the Drum
Maintenance Camshaft (or any component requiring removal of the Process
Drive), the printer may experience Front Cover jams from Tray
2. The jam
occurs with paper in the Preheater and C3T jam errors (strip flag timeout
during transfix) recorded in Jam History. In many cases, Tray 1 (MPT) prints
with no jams.
These symptoms indicate that the Transfix Load Module is incorrectly timed
resulting in a late arrival of the leading edge at the strip flag. The likely cause
is the position of the Drum Maintenance Camshaft gear in relation to the
Process Drive gear. To correct the timing problem requires removal of the
Process Drive and realignment of the Drum Maintenance Camshaft.
To correct the problem, follow these steps:
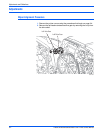
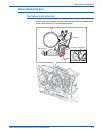
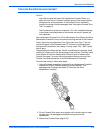
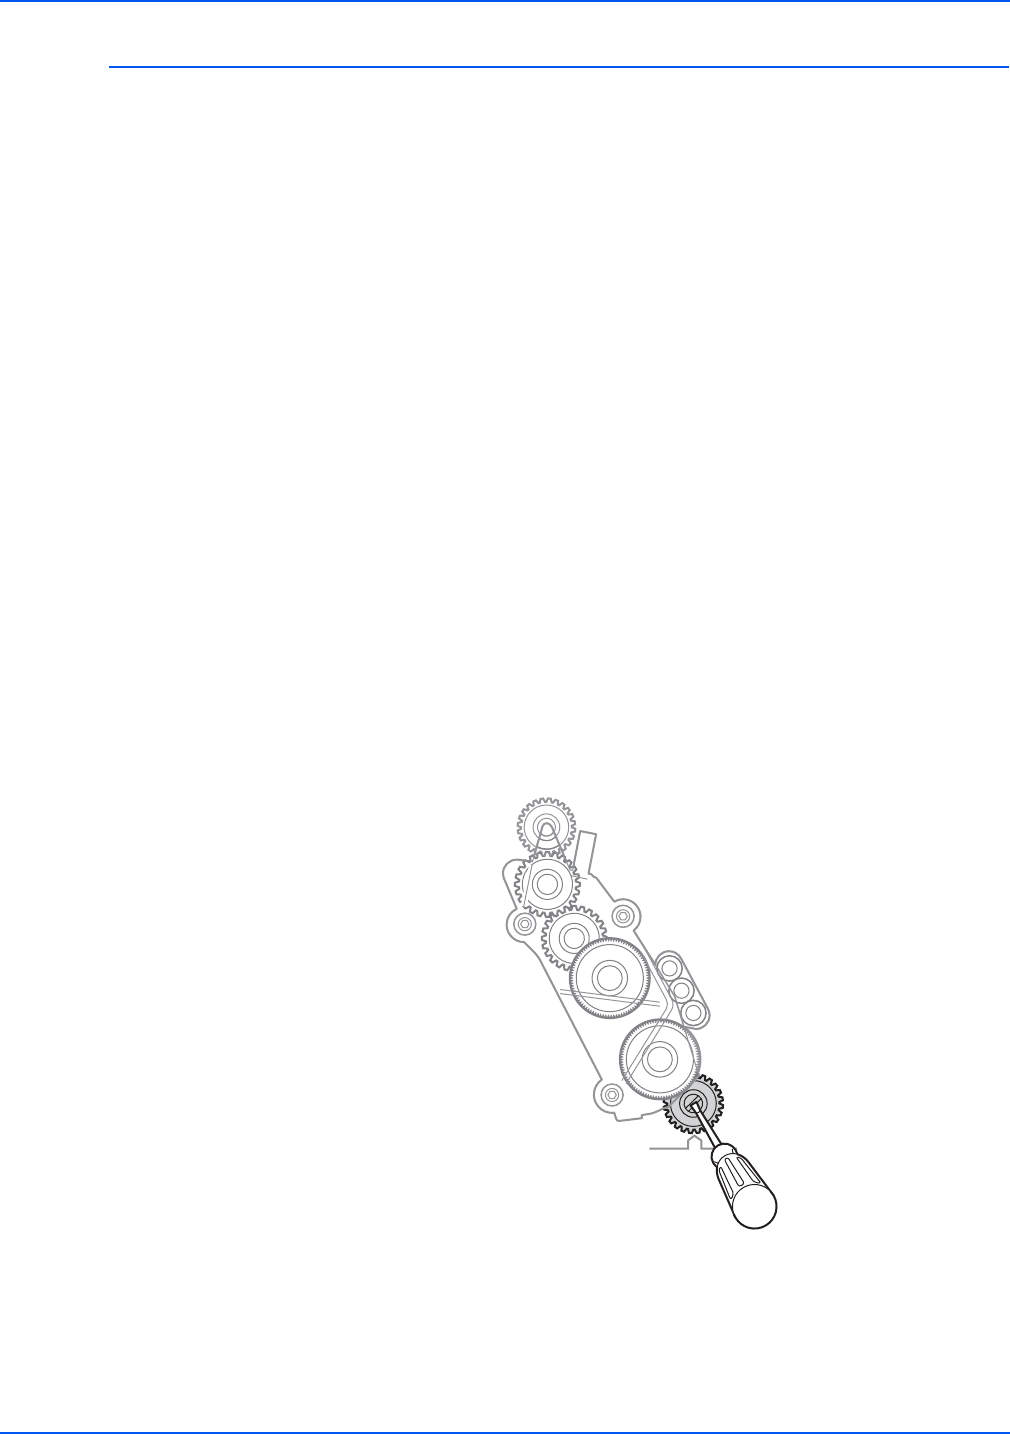
1. Using a flat-blade screwdriver, rotate the Drum Maintenance Camshaft
clockwise to tilt the Printhead forward to its home position. This
disengages the Printhead and Head Tilt Gear from the Drum
Maintenance Camshaft.
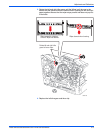
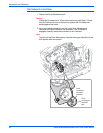
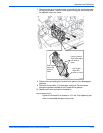
2. Pin the Process Drive gears using a paper clip or similar object to keep
the gear set in its disengaged orientation during removal and
replacement.
3. Remove the Process Drive (page 8-43).
s8560-198