


COPYRIGHT
©
1998 CANON INC. CANON NP7161/NP7160 REV.0 AUG. 1998 PRINTED IN JAPAN (IMPRIME AU JAPON)
6–9
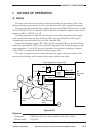
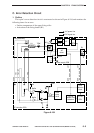
CHAPTER 6 FIXING SYSTEM
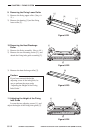
Figure 6-204
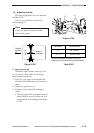
Figure 6-205
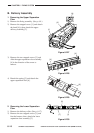
Figure 6-206
[8]
[7]
[5]
[3]
[4]
[6]
[2]
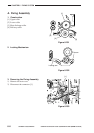
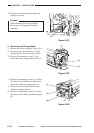
3) Remove the drum unit. (See p. 4-28.)
4) Remove the delivery upper cover. (See p.
7-11.)
5) Remove the delivery lower cover. (See p.
7-11.)
6) Disconnect the two connectors [2] (J108,
J109) on the DC controller PCB, and free
the wires from the harness guide.
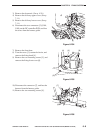
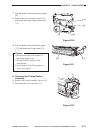
7) Remove the front door.
8) Turn the screw [3] counterclockwise, and
remove the fixing knob [4].
9) Remove the two mounting screws [5], and
remove the fixing front cover [6].
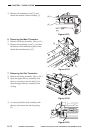
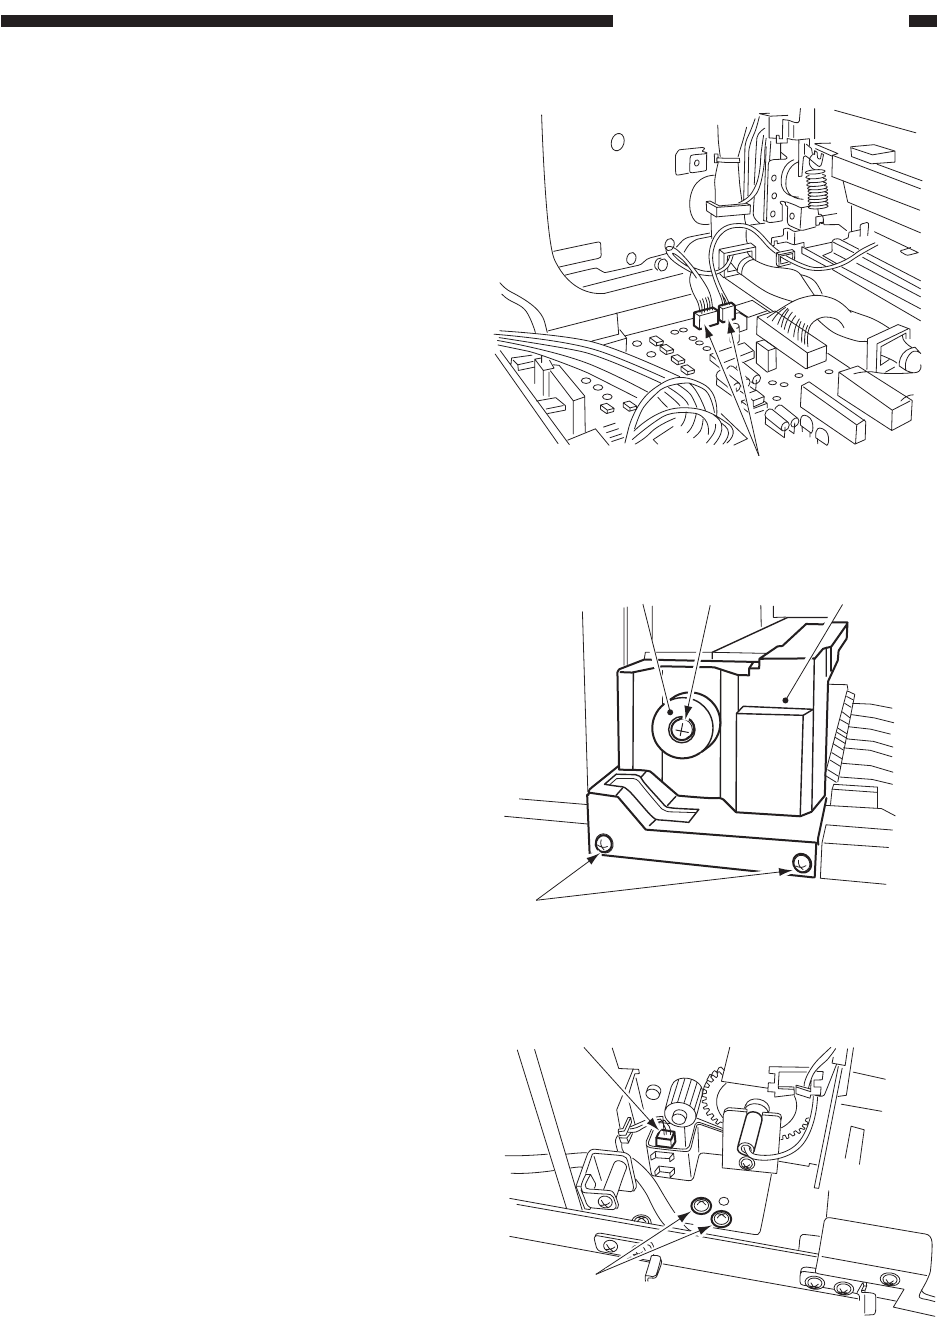
10) Disconnect the connector [7], and free the
harness from the harness guide.
11) Remove the two mounting screws [8].