


CHAPTER 8 INSTALLATION
8–18
COPYRIGHT
©
1998 CANON INC. CANON NP7161/NP7160 REV.0 AUG. 1998 PRINTED IN JAPAN (IMPRIME AU JAPON)
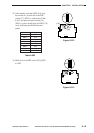
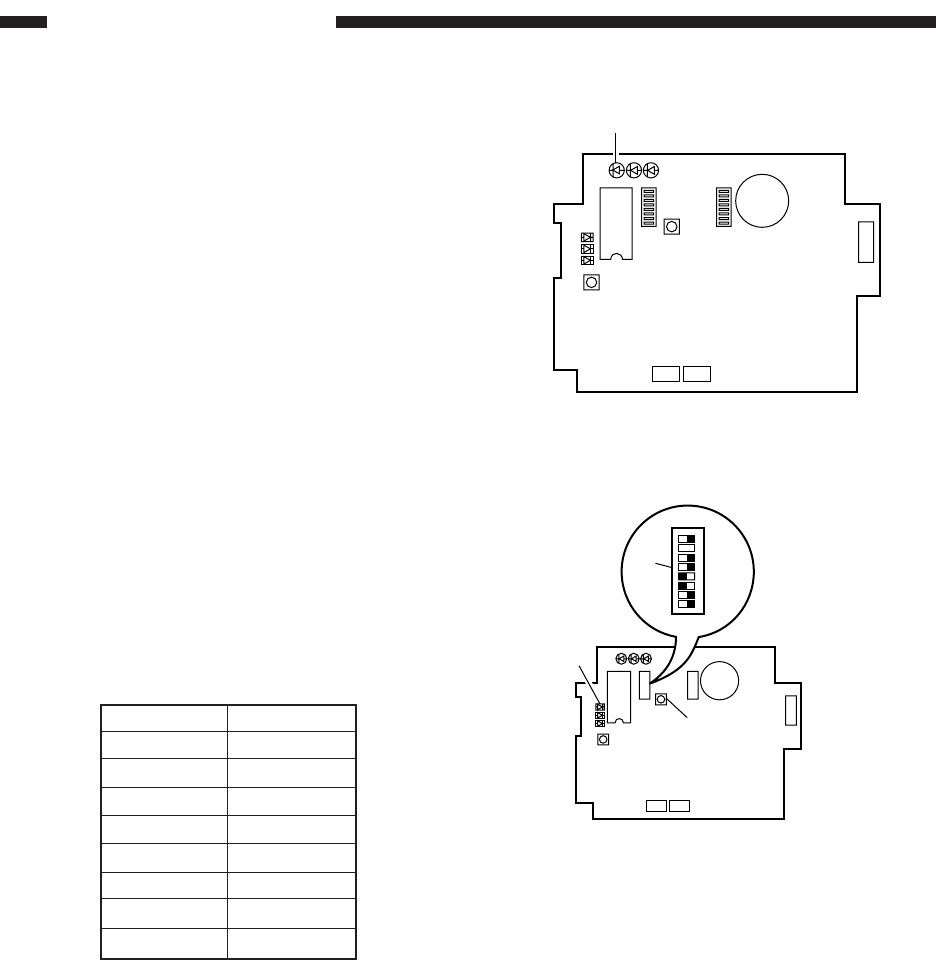
LED1 LED2 LED3
2
1
LED5
LED6
LED4
IC6
SW1
SW4
SW3
6
1
BAT1
CN4
1
2
CN3 CN2
SW2
[16]
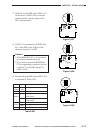
Figure 8-510
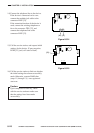
LED1LED2 LED3
2
1
LED5
LED6
LED4
IC6
SW1
SW4
SW3
6
1
BAT1
CN4
1
2
CN3 CN2
12345678
SW2
[17]
[18]
[19]
SW2 bits
SW2-1
SW2-2
SW2-3
SW2-4
SW2-5
SW2-6
SW2-7
SW2-8
Settings
OFF
OFF
OFF
ON
OFF
ON
See step 9).
OFF
Table 8-502
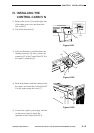
Figure 8-511
10) Connect the power supply unit to the
power plug, and check to make sure that
LED1 [16] (green) turns on.
11) Execute RAM clear.
Set each bit of the DIP switch [17] (SW2)
as indicated in Table 8-502, and press the
push switch [18] (SW4). A press should
turn on LED5 [19] (red).