


•
Ensurethatyouknowhowtohandleand storetheline card(see“Handling andStoring
Line Cards in EX8200 Switches” on page 227).
•
Ensurethe switch hassufficient power topowertheline cardwhilemaintainingits N+1
or N+N power configuration:
•
To determine the power requirements of the line card, see “Power Requirements for
EX8208SwitchComponents”onpage111orPowerRequirementsforEX8216Switch
Components.
•
To determine whether the switch has enough power available for the line card, use
the show chassis power-budget-statistics command if your switch is running Junos
OS Release 10.2or later.If your switchis running Junos OS Release 10.1 or earlier,see
“Calculating Power Requirements foran EX8208 Switch” on page114 or Calculating
Power Requirements for an EX8216 Switch to calculate the available power.
Ensure that you have the following parts and tools available to install a line card in the
switch:
•
ESD grounding strap
•
Phillips (+) screwdriver, number 2
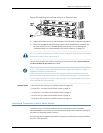
To install a line card in the switch:
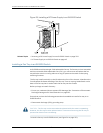
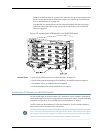
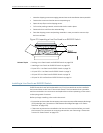
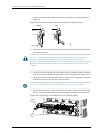
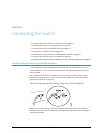
1. Attach the ESDgrounding strap to your bare wrist and connect the strap tothe ESD
pointonthe switchchassis(seeFigure58onpage161).TheESDpointisatthesame
location on EX8208 and EX8216 switches.
Figure 58: Location of the ESD Point on an EX8200 Switch Chassis
2. Ifthe line cardslothas a coverpanel on it, usethe screwdriver toremove the captive
screwson eachsideof thecoverpanel. Savethe coverpanel andthe screwsforlater
use.
CAUTION: Do not lift the line card by holding the ejector levers on the faceplate or the
edge connectors. The levers cannot support the weight of the line card. Lifting the line
cardby the levers might bend them. Bent levers prevent line cards from being properly
seated in the chassis.
3. Takingcare not to touch line card components, pins, leads, or solder connections,
remove the line card from its bag.
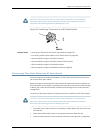
4. Graspthe ejectorlevers onthe faceplateofthe line cardandpull them outwarduntil
they are fully open. The closed and the open positions of the shorter ejector levers
161Copyright©2010,Juniper Networks, Inc.
Chapter9:Installing SwitchComponents