Document No. 10-300077, Issue 2 6-27
Using VLANs, Hunt Groups, and VTP Snooping
6. Repeat Steps 1-9 for any additional ports that you want to add to this
hunt group.
7. Repeat steps 1 through 10 on the switch at the other end of the hunt
group connection.
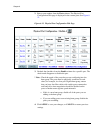
8. In the navigation pane, expand the Modules & Ports folder, and then
click Configuration. The Module Information Web page is redisplayed.
See Figure 6-11.
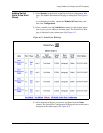
9. Select a port number from the Ports column. The Physical Port
Configuration Web page is displayed. See Figure 6-12.
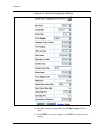
10. Select a checkbox from the Enable column for that port. The group can
now function as a load-sharing connection.
11. Click APPLY to save your changes, or CANCEL to restore previous
settings.
* Note: If thousands of addresses have been learned on a port and a link
in the hunt group goes down, the switch-over of traffic between
ports may take several seconds.
* Note: If you use static VLAN binding and hunt groups, make sure to
first bind all the VLANs to all the ports that you will use in the
hunt group and then apply the hunt group to those ports.
Viewing Hunt Group Members
You can view hunt group members from either the Web Agent or the CLI.
Web Agent
Procedure
To view details about hunt group members using the Web Agent:
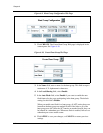
1. In the navigation pane, expand the L2 Switching folder, and then click
Hunt Groups.
The Hunt Group Configuration Web page is displayed in the content
pane. See Figure 6-9.
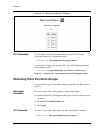
2. Select a underlined number in the Members column.
The Hunt Group Members Web page is displayed in the content pane
and displays information about the members of that hunt group
(Figure 6-15).


