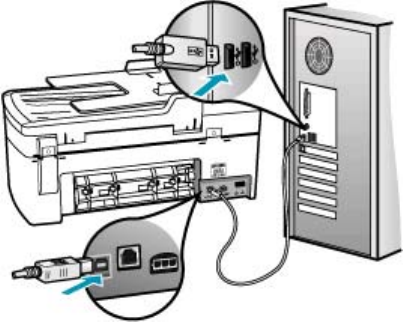
Communication problems over a USB connection
If the HP All-in-One and computer are not communicating with each other, try the
following:
• Look at the display on the HP All-in-One. If the display is blank and the Power button
is not lit, the HP All-in-One is turned off. Make sure the power cord is firmly connected
to the HP All-in-One and plugged into a power outlet. Press the Power button to turn
on the HP All-in-One.
• Check the USB cable. If you are using an older cable, it might not be working properly.
Try connecting it to another product to see if the USB cable works. If you experience
problems, the USB cable might need to be replaced. Also verify that the cable does
not exceed 3 meters (9.8 feet) in length.
• Check the connection from the HP All-in-One to your computer. Verify that the USB
cable is securely plugged into the USB port on the back of the HP All-in-One. Make
sure the other end of the USB cable is plugged into a USB port on your computer.
After the cable is connected properly, turn the HP All-in-One off and then on again.
• Check the System Profiler to verify your USB connection. If the HP All-in-One shows
up in the USB window, then the USB connection between your computer and HP All-
in-One is working. If it is working, there might be a problem with the software. Use
the Setup Assistant that came with your HP Photosmart Studio (Mac) Software to see
if it can detect the HP All-in-One. Refer to the help provided with your operating
system for instructions on accessing the System Profiler.
• If you are connecting the HP All-in-One through a USB hub, make sure the hub is
turned on. If the hub is on, try connecting directly to your computer.
• Check other printers or scanners. You might need to disconnect older products from
your computer.
• Try connecting the USB cable to another USB port on your computer. After you check
the connections, try restarting your computer. Turn the HP All-in-One off and then on
again.
• If necessary, remove and then install the software you installed with the HP All-in-
One again.
Troubleshooting tips 137
