


Chapter 6: Security
115
Creating Role-Based Access Control Rules
Role-based access control rules accept or drop traffic, based on the
user's role and IP address. Like firewall rules, the order of rules is
important, since the rules are executed in numerical order.
To create role-based access control rules:
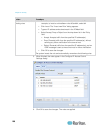
1. Choose Device Settings > Security > Role Based Access Control.
The Configure Role Based Access Control Settings dialog appears.
2. Click the IPv4 tab for creating firewall rules, or click the IPv6 tab for
creating IPv6 firewall rules.
3. Ensure the Enable Role Based Access Control for IPv4 checkbox is
selected on the IPv4 tab, or the Enable Role Based Access Control
for IPv6 checkbox is selected on the IPv6 tab.
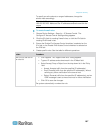
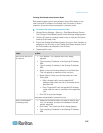
4. Create specific rules:
Action
Do this...
Add a rule to the end of
the rules list
Click Append. The "Append new Rule" dialog
appears.
Type a starting IP address in the Starting IP Address
field.
Type an ending IP address in the Ending IP Address
field.
Select a role from the drop-down list in the Role field.
This rule applies to members of this role only.
Select Allow or Deny from the drop-down list in the
Policy field.
Allow: Accepts traffic from the specified IP
address range when the user is a member of the
specified role
Deny: Drops traffic from the specified IP address
range when the user is a member of the specified
role
Click OK to save the changes.
The system automatically numbers the rule.
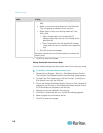
Insert a rule between
two existing rules
Select the rule above which you want to insert a new
rule. For example, to insert a rule between rules #3
and #4, select #4.
Click Insert. The "Insert new Rule" dialog appears.
Type a starting IP address in the Starting IP Address
field.