


Other Printing Problems
79
5
Other Printing Problems
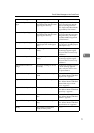
Status Possible Causes, Descriptions, and Solutions
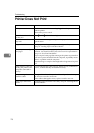
The print side of the page is a
hazy gray.
Adjust the image density.
See p.101 “Making Printer Settings with the Control Panel”.
If paper is curled, correct it.
If you continuously print data that contains extremely small
amount of words or images in the printable area, the printed
side of the page could be a hazy gray. Adjust the image den-
sity. See p.101 “Making Printer Settings with the Control
Panel”.
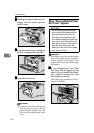
Shaking the toner cartridge after pulling out the toner seal
can cause dirt on paper surfaces, toner spillage, or printer
failure. If you have accidentally shaken the toner cartridge,
print some pages (about 50 pages) until the dirt disappear.
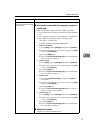
Image quality varies when
printing on thick paper or on
OHP transparencies.
Switch to Thick Paper mode.
• When toner is not fused enough, set it to “On”.
• When the image is blurred, set it to “----”.
See p.101 “Making Printer Settings with the Control Panel”.
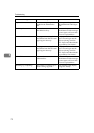
Some parts of the print image
are not clear.
Make the image density darker.
See p.101 “Making Printer Settings with the Control Panel”.
If Toner Saving mode is selected using the control panel, the
whole image gets lighter.
The print image is not clear. Due to a sudden change in temperature, condensation might
appear inside the printer, reducing print quality. If this oc-
curs, when you move the printer from a cold room to a
warmer room, do not use the printer until it acclimatizes to
the temperature.
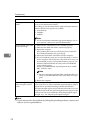
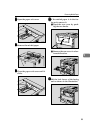
Nothing is printed on the paper. Check if the tape of the toner cartridge is completely re-
moved. Be sure to remove the tape completely when replac-
ing the toner cartridge. See p.90 “Replacing the Toner
Cartridge”.
Note
❒ If the power switch is turned on with the tape still at-
tached to the toner cartridge, the printer might be dam-
aged.
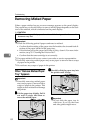
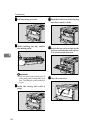
Multiple pages are fed through
the printer at once.
Clean the friction pad if it is dirty. See p.93 “Cleaning the
Friction Pad”.
Remove all paper from the tray and fan it gently to get air be-
tween the sheets. After that, load it back into the tray.
The image is printed on the re-
verse side of the paper.
Set the paper the other way up.