


June 2005 © TOSHIBA TEC e-STUDIO281c/351c/451c ADJUSTMENT
3 - 25
3
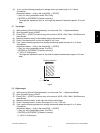
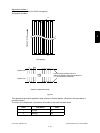
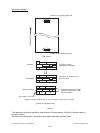
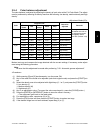
(2) Print out the test pattern and adjust its deviation amount (above). Use the image position of
magenta (M) as a reference for adjustment. The image positions of yellow (Y), cyan (C) and
black (K) must be adjusted with this reference.
• Select A4/LT size. Key in “68” and then press the [FAX] button. -> 4 pages of the test pattern
are printed out.
• Check the image of the test pattern (above) and specify the color to be adjusted.
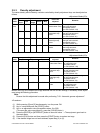
• Key in the code (listed above) and press the [START] button.
• Key in the sub code of the color to be adjusted and press the [START] button.
Sub code 0: Black (K) 1: Cyan (C) 3: Yellow (Y)
• Key in the adjustment value and press the [ENTER] or [INTERRUPT] button.
Notes:
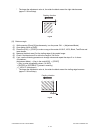
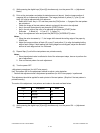
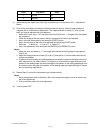
1. When the value increases by “1”, the image shifts toward the trailing edge of the paper by
0.0423 mm.
2. Adjust the image positions of black (B), cyan (C) and yellow (Y) to align the leading/trailing
edge of each image. If both leading and trailing edges are not aligned, adjust the deviation
amount of each edge so that it is made uniform.
(3) Repeat Step (2) until all the test patterns are printed correctly.
Notes:
1. Since the adjusted value is reflected in that of the subsequent steps, be sure to perform the
rest of the adjustment.
2. Print out the test pattern for each adjustment.
(4) Turn the power OFF.