


e-STUDIO281c/351c/451c ADJUSTMENT June 2005 © TOSHIBA TEC
3 - 74
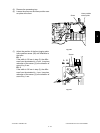
Duplex copying:
(1) Turn the power ON while pressing [0] and [5] simultaneously, key in [366] and then press the
[START] button.
(2) Enter the value.
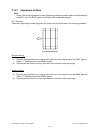
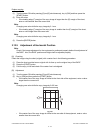
• If the leading edge (F) margin of the copy image is larger than the (E) margin of the chart,
enter a value smaller than the current one.
Note: Note:
Changing one value shifts the copy image by 0.1 mm.
• If the leading edge (F) margin of the copy image is smaller than the (E) margin of the chart,
enter a value larger than the current one.
Note: Note:
Changing one value shifts the copy image by 0.1 mm.
(3) Press the [ENTER] button.
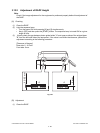
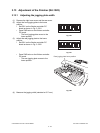
3.12.5 Adjustment of Horizontal Position
Note: Note:
Check if the image adjustment for the equipment is performed properly before this adjustment of
the RADF. Also, the RADF position and height shall be adjusted properly.
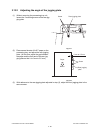
[A] Checking
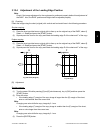
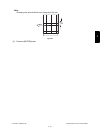
Check the image using the chart (original) with a center line in the following procedure.
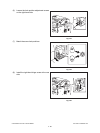
(1) Place the chart provided as an original with its face up on the original tray of the RADF.
(2) Press the [START] button.
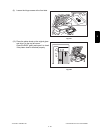
(3) Fold the copy in half and check if the center line is misaligned.
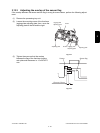
[B] Adjustment
(1) Turn the power ON while pressing [0] and [5] simultaneously.
(2) Key in [358] and then press the [START] button.
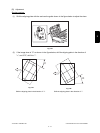
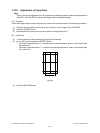
• If the center line of the copy image is shifted to the front side of the equipment, enter a value
larger than the current one.
Note: Note:
Changing one value shifts the copy image by 0.042 mm.
Fig.3-61
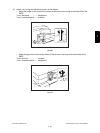
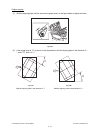
• If the center line of the copy image is shifted to the rear side of the equipment, enter a value
smaller than the current one.
G