


e-STUDIO281c/351c/451c ADJUSTMENT June 2005 © TOSHIBA TEC
3 - 90
3.14.2 Adjusting the staple position (Finisher unit)
Perform this adjustment after replacing the finisher controller PC board or when the staple position
must be changed for some reason. This adjustment adjusts the front/rear stitches with A4/A4-R when
the paper used for adjustment is AB type and with LT/LT-R when the paper is INCH type.
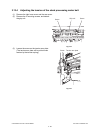
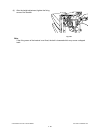
(1) Remove the rear cover of the finisher unit.
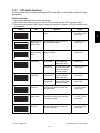
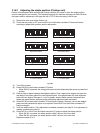
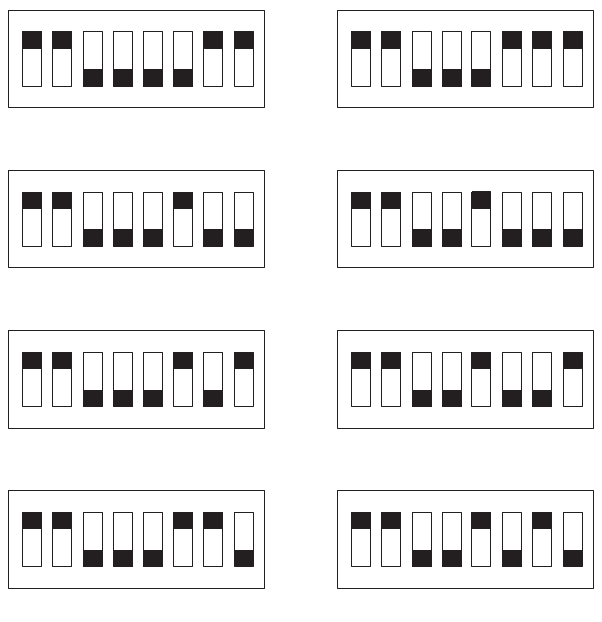
(2) Check that the power is OFF and set SW104 on the finisher controller PC board as follows
according to paper/stitch position used for adjustment.
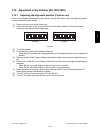
Fig.3-86
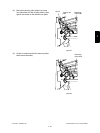
(3) Turn ON the power.
(4) Press SW103 on the finisher controller PC board.
• When SW103 is pressed, the swing guide opens and the alignment plate moves to prescribed
position.
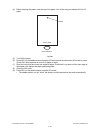
(5) Place a sheet of paper between the alignment plates. Push it against the stopper and push the
rear edge of the paper against the rear alignment plate. If the gap between the front alignment
plate and front edge of the paper is 1 mm or greater, stop the staple position adjustment and
repeat the staple position adjustment after completing alignment plate adjustment.
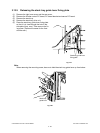
(6) Press SW103 on the finisher controller PC board once to staple. However, remove the stapled
paper manually because the paper is not ejected. Press SW103 on the finisher controller PC
board once again.
(7) Verify the staple position. If any adjustment is needed, proceed to the step 8). If no adjustment is
needed, proceed to the step 9).
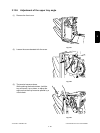
(8) Press SW101 or SW102 on the finisher controller PC board to adjust the staple position.
• When SW101 is pressed, the staple position shifts 0.49 mm to the front side.
• When SW102 is pressed, the staple position shifts 0.49 mm to the rear side.
Repeat the steps 5) to 7).
ON
12345678
ON
12345678
ON
12345678
ON
12345678
ON
12345678
ON
12345678
ON
12345678
ON
12345678
A4/front stitch A4/rear stitch
A4-R/front stitch A4-R/rear stitch
LT/front stitch LT/rear stitch
LT-R/front stitch LT-R/rear stitch