


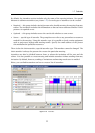

1.7 Calendar
79
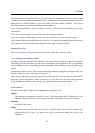
Once attendees are selected, save settings by the OK button. The dialog is closed and
all selected addresses are listed. Various icons are used to mark attendees as required,
optional or resource. Roles of attendees can be changed (see figure 1.72)
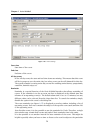
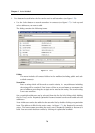
• Use the Add button to add users to the list by hand. In case you know the particular
email address by heart, this method is the fastest one. The Add button can also be
used if the address we intend to add is not included in our contact lists.
The Add button is not active unless there is at least one line blank where another
address can be added. Once addresses are filled in all entries, the button is activated
so that another line can be added.
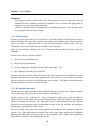
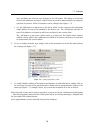
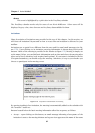
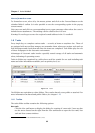
2. To set or change attendee type, simply click on the attendee icon in the list and perform
the settings (see figure 1.72).
Figure 1.72 Setting an attendee’s status
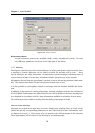
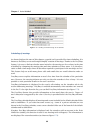
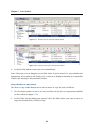
3. To enable/disable sending of invitations and updates to individual users, simply click on
the envelope icon next to the particular user’s name and set an appropriate option in the
menu (see figure 1.73). Simply choose yes to send the invitation or no not to send it.
When inserted, events can be sent to attendees or just saved by the Send button (Send update
— this button appears instead of the Send option where an existing meeting is changed) and
the Save and Close toolbar button.
Note: Appointments can be canceled only by their initiators.