Chapter 13 Interfaces
ZyWALL USG 300 User’s Guide
294
Each section in this screen is described below.
13.3 Ethernet Summary Screen
This screen lists every Ethernet interface and virtual interface created on top of
Ethernet interfaces. To access this screen, click Configuration > Network >
Interface.
Unlike other types of interfaces, you cannot create new Ethernet interfaces nor
can you delete any of them. If an Ethernet interface does not have any physical
ports assigned to it (see Section 13.2 on page 293), the Ethernet interface is
effectively removed from the ZyWALL, but you can still configure it.
Ethernet interfaces are similar to other types of interfaces in many ways. They
have an IP address, subnet mask, and gateway used to make routing decisions.
They restrict the amount of bandwidth and packet size. They can provide DHCP
services, and they can verify the gateway is available.
Use Ethernet interfaces to control which physical ports exchange routing
information with other routers and how much information is exchanged through
each one. The more routing information is exchanged, the more efficient the
routers should be. However, the routers also generate more network traffic, and
some routing protocols require a significant amount of configuration and
management. The ZyWALL supports two routing protocols, RIP and OSPF. See
Chapter 16 on page 389 for background information about these routing
protocols.
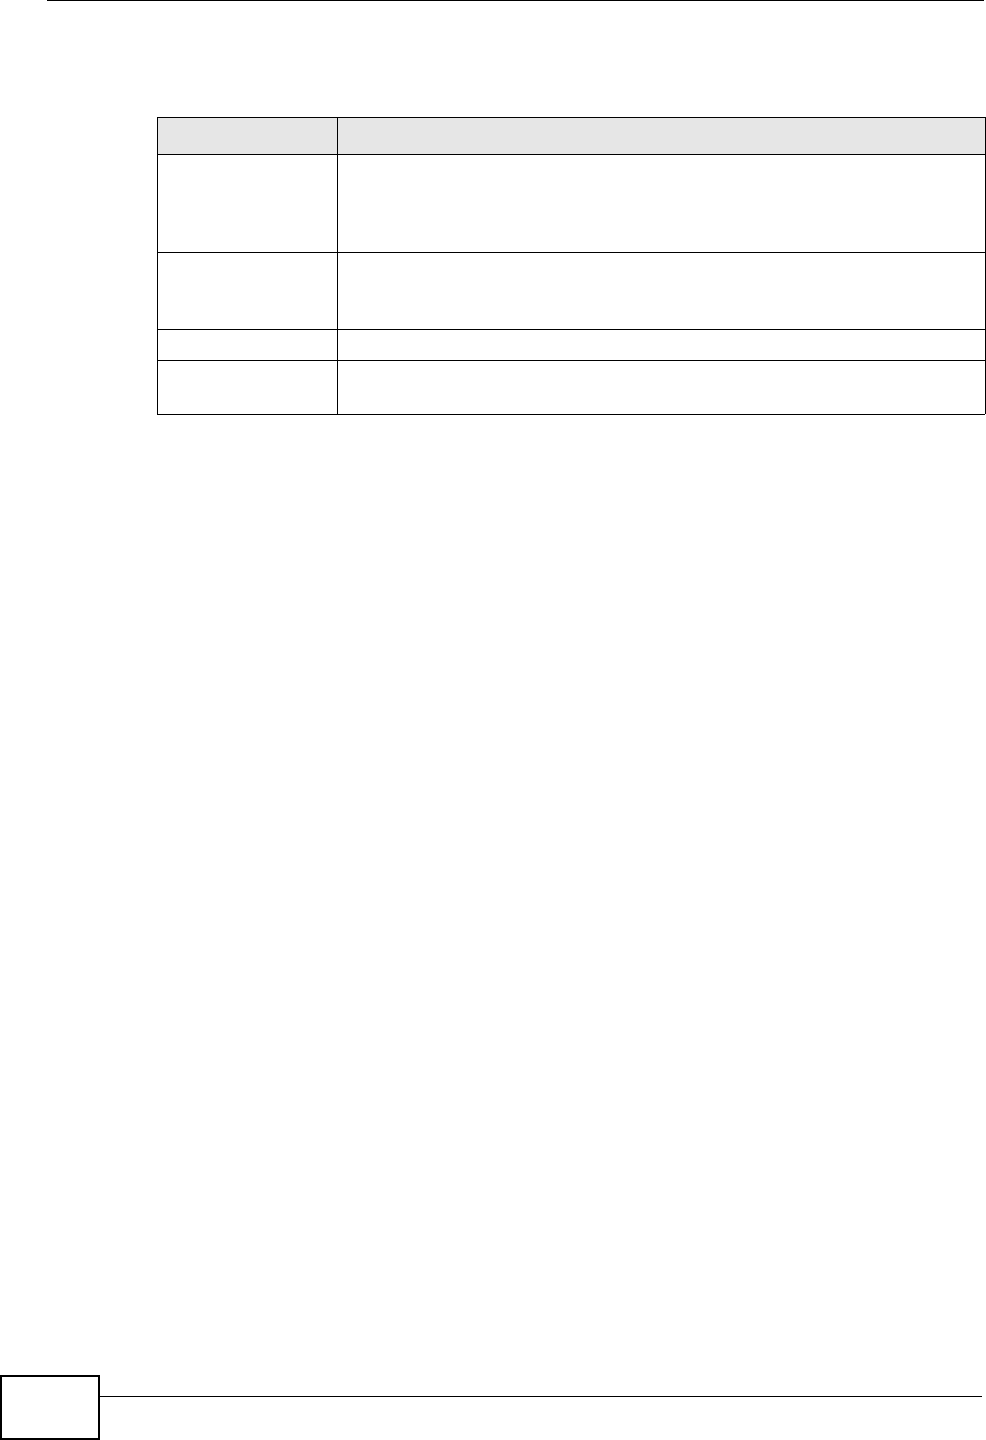
Table 58 Configuration > Network > Interface > Port Grouping Role
LABEL DESCRIPTION
Representative
Interface (ge1,
ge2, ge3, ge4,
ge5, ge6)
These are Ethernet interfaces. To add a physical port to a
representative interface, drag the physical port onto the
corresponding representative interface.
Physical Port (1,
2, 3, 4, 5, 6)
These are the physical ports as they appear on the front panel of the
ZyWALL. To add a physical port to a representative interface, drag the
physical port onto the corresponding representative interface.
Apply Click this button to save your changes and apply them to the ZyWALL.
Reset Click this button to change the port groups to their current
configuration (last-saved values).


