Options
20
1
C
CC
C
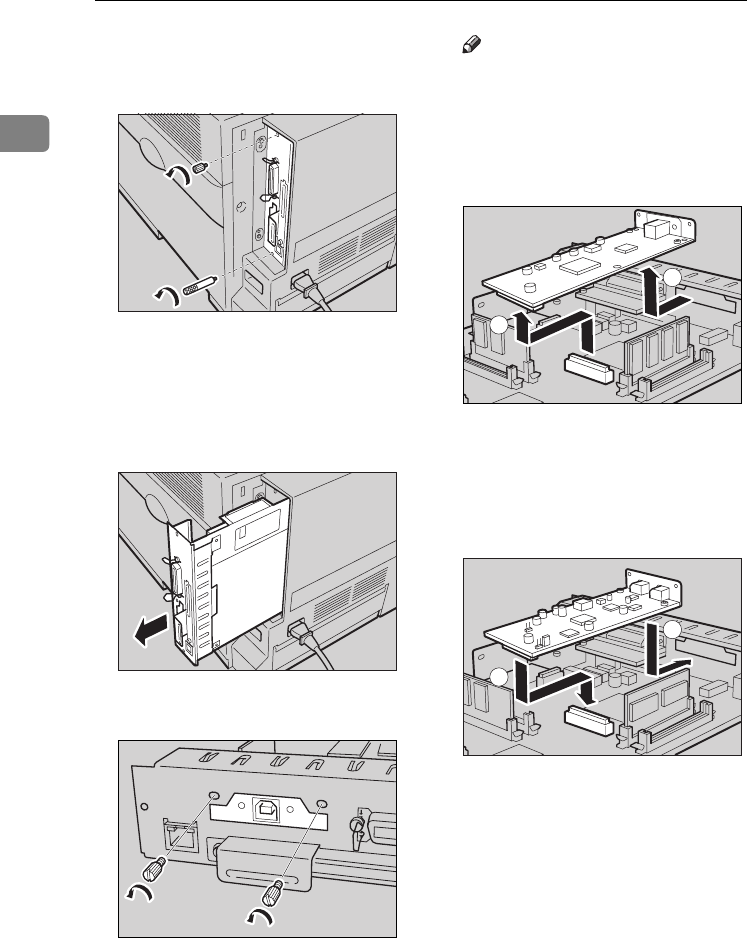
Remove the two screws that fas-
ten the controller board on the
back of the printer.
The removed screws will be used
in step
I
to fasten the controller
board.
D
DD
D
While holding the handle, pull
out the controller board slowly.
E
EE
E
Remove USB2.0 Interface Unit.
Note
❒ The removed screws will be
used in step
G
to fasten the 1394
Interface Unit.
❒ Lift the end of USB2.0 Interface
Unit (A), and then remove it
from the controller board (B).
F
FF
F
Attach the 1394 Interface Unit to
the controller board. Insert the
end of the 1394 Interface Unit into
the opening (A
AA
A), and then push
down until it clicks (B
BB
B).
Confirm that the 1394 Interface
Unit is firmly connected to the con-
troller board.
ZHBP080E
ZHBP020E
ZHBPB460E
ZHBP450E
1
2
ZHBP050E
1
2
AresPGBOptionSetup-F_FM.book Page 20 Monday, July 29, 2002 1:12 PM


