Options
36
1
Note
❒ The removed screws will be
used in step
G
.
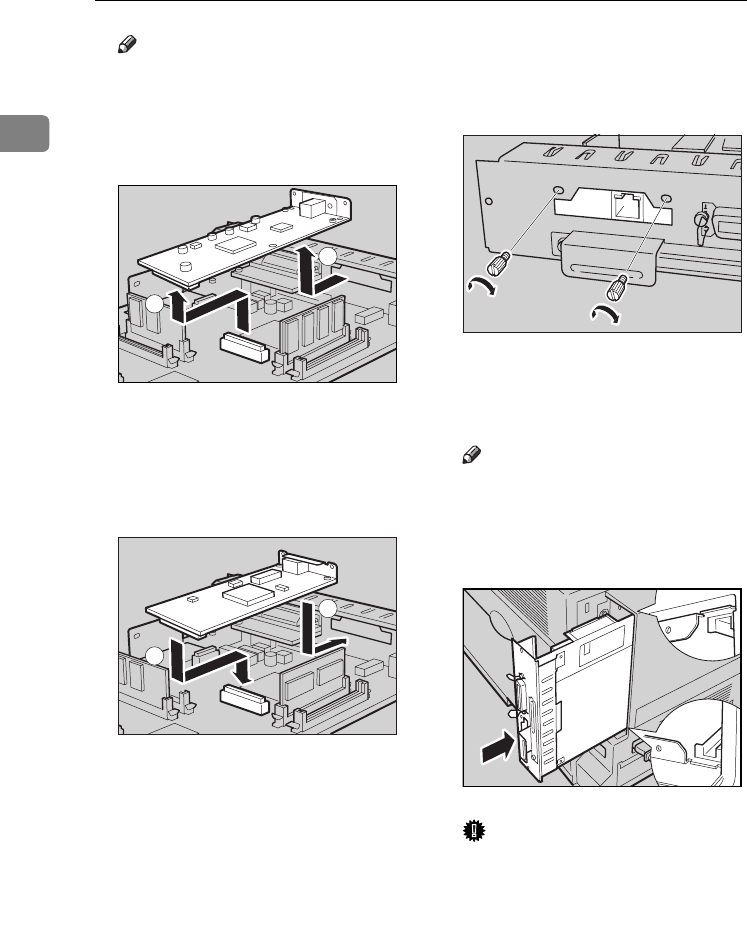
❒ Lift the end of USB2.0 Interface
Unit (A), and then remove it
from the controller board (B).
F
FF
F
Attach the Network Interface
Board. Insert the end of the Net-
work Interface Board to the open-
ing (A
AA
A), and then push down
until it clicks (B
BB
B).
Confirm that the Network Inter-
face Board is firmly connected to
the controller board.
G
GG
G
Fasten the Network Interface
Board on the controller board us-
ing the screws that you removed
in step
E
EE
E
.
H
HH
H
Align the controller board to the
top and bottom rails, and then
push in slowly until it stops.
Note
❒ When installing other options
on the controller board, do not
close the controller board, but
go to the steps for installing the
option.
Important
❒ The printer may not work prop-
erly if the controller board is not
set properly.
I
II
I
Fasten the controller board to the
printer with the two screws that
ZHBP450E
1
2
ZHBPA050E
1
2
ZHBPC060E
ZHBPA070E
AresPGBOptionSetup-F_FM.book Page 36 Monday, July 29, 2002 1:12 PM


