


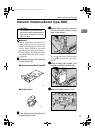

Network Interface Board Type 3000
37
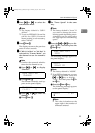
1
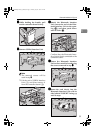
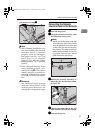
you removed in step
C
CC
C
.
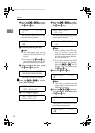
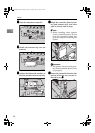
Note
❒ After finishing installation, you
can check whether the Network
Interface Board is installed
properly. Print the configura-
tion page from the "List/Test
Print" menu. If it is installed
properly, you will see "Option
Ethernet Board" for "Controller
Option".
❒ If the Network Interface Board
is not installed properly, rein-
stall it from step
B
. If you cannot
install it properly even after at-
tempting reinstallation, contact
your sales or service representa-
tive.
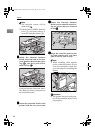
Reference
See "Making Printer Settings
with the Control Panel" in the
Administrator Reference for
printing the configuration page.
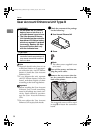
Connecting the Network
Interface Cable to the Network
A
AA
A
Turn off the power
B
BB
B
Loop the network interface cable
and attach the ferrite core.
Note
❒
Attach two ferrite cores to the net-
work interface cable. One of them
must be attached close to the end
of the cable (on the end closet to
the printer). The other must be at-
tached approximately 45 cm (18")
(
A
) apart from the end. Attach
each ferrite core with a loop.
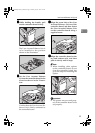
C
CC
C
Attach the network interface ca-
ble to the jack on the Network In-
terface Unit.
D
DD
D
Connect the other end of the net-
work interface cable to the network.
E
EE
E
Turn on the power.
ZHBPA010E
ZHBP913E
ZHBP1470E
AresPGBOptionSetup-F_FM.book Page 37 Monday, July 29, 2002 1:12 PM