


9. MAJOR UNIT REPLACEMENT EO18-33027
9.7 PRINT HEAD
9-17
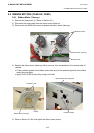
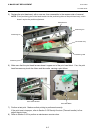
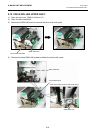
5) Replace the print head ass’y with a new one, then reassemble in the reverse order of removal.
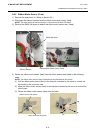
NOTE: Fit the positioning pins of the head bracket into the positioning holes of the print head ass’y, which
doesn’t require the position adjustment.
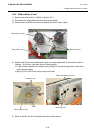
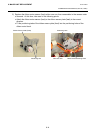
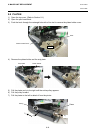
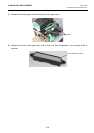
6) Make sure that the print head harness doesn’t appear out of the print head block. If so, the print
head harness may touch the ribbon and the media, causing a print failure.
7) Perform a test print. Make sure that printing is performed correctly.
If the print tone is improper, refer to Section 5.5.5 Density fine tune (Thermal transfer) to fine
adjust the print tone.
8) Refer to Section 5.8.2 to perform a maintenance counter clear.
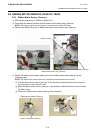
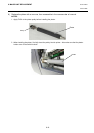
Positioning Pin
Head Bracket
Positioning Hole
Print Head Ass’y
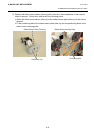
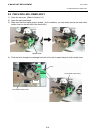
Positioning Pin
Positioning Hole
Print Head Harness
Print Head Block