


Brocade Network Advisor IP User Manual 1199
53-1003056-01
Event custom reports
37
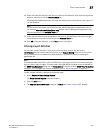
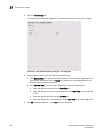
5. To limit the search results to traps, syslog, and pseudo event messages with a specific text
string, enter the text string in the Description field.
You can use an asterisk (*) to indicate a wildcard, as in the following examples:
• *cdef: Matches a message ending with cdef
• abc*: Matches a message beginning with abc
• *abc*: Matches a message that contains abc
For example, if you want to find the events that have the text “Auth” in the message, enter
“*Auth*”.
NOTE
You can view all port history events for a switch by creating an event custom report and
entering a description of Port Login/Logout History for that particular switch. The Port
Login/Logout history trap will be listed under the Available traps list of the Add Trap Filter
dialog box and the Add Event Action dialog box — Events pane.
For information about event categories, refer to “Event Categories” on page 1277.
6. To limit the search results to traps, syslog, and pseudo event messages from a specific IP
address, enter the IP address or the AP MAC address in the Address field. You can enter
multiple addresses. Separate each address with a comma.
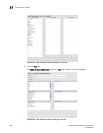
7. Select the Acknowledge check box if you want messages that have been acknowledged to be
included in the report.
8. Select the severity from the Available Severity list, and click the right arrow button to move your
selection to the Selected Severity list. Events with the selected severity are included in the
report.
9. Select the event type you want to include in the report from the Available Event Category list.
Click the right arrow button to move your selection to the Selected Event Category list.
10. Select the event action you want to include in the report from the Available Event Actions list.
Click the right arrow button to move your selection to the Selected Event Actions list.
11. Click OK to save the definition, Run to launch the report, or click the Time Settings tab on the
Add/Edit Report Definition dialog box if you want to filter the events by date and time.
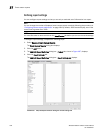
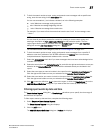
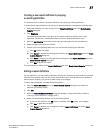
Filtering report events by date and time
The Event Custom Reports dialog box — Time Settings tab allows you to specify the time range of
the events to be reported.
To filter report events by date and time, complete the following steps.
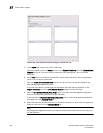
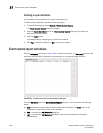
1. Select Reports > Event Custom Reports.
The Event Custom Reports dialog box displays.
2. Click the Add button.
The Add/Edit Report Definition dialog box - Product tab displays.