


5-100
Cisco MGX 8800/8900 Series Hardware Installation Guide
Releases 2 - 5.2, Part Number OL-4545-01, Rev. H0, May 2006
Chapter 5 Installing the Cisco MGX Switch or Gateway
Installing the MGX 8830 or MGX 8830/B Switch
Note After completing these steps, proceed to the “First Time Power On Procedure for MGX Switches”
section on page 5-137 if this is a first-time installation.
Step 5
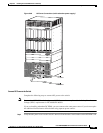
Install the AC Power Supply Tray
• Remove the AC Power Supplies from the AC Power Supply Tray
• Install the AC Power Supply Tray(s)
• Reinstall the AC Power Supplies
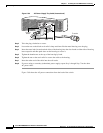
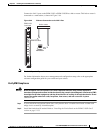
Connect the Console Port
Step 6
Install the Cisco MGX 8850
Switch without a Mechanical Lift
• Prepare for Installation
• Remove the Front Cards
• Remove the Back Cards
• Remove the Back Cards from
an APS Assembly
• Remove the DC PEM(s)
• Install the Switch in the Rack
or Cabinet
• Reinstall the APS Assembly
• Reinstall the Back Cards
• Reinstall the DC PEM(s)
• Reinstall the Front Cards
Install the Cisco MGX 8850
Switch with a Mechanical Lift
• Install the Switch in a 19-Inch
or 23-Inch Rack
• Install the Switch in a 19-Inch
Cabinet
Connect Power to the Cisco MGX
8830 Switch
• Connect AC Power to the
Switch
• Connect DC Power to the
Switch
Step 7
Install the Cable Management Assembly Connect the External Clock
(optional)
Step 8
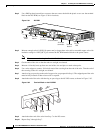
Connect the AC Power Supply Tray to the Cisco MGX 8830 Switch Connect the Alarms
Step 9
Connect the Back Cards Connect the MP Connection
Step 10
Connect the Console Port Connect the LAN1/2 Ports
Step 11
Connect Power to the Cisco MGX 8830 Switch
• Connect AC Power to the Switch
• Connect DC Power to the Switch
Verify EMI Compliance
Step 12
•
Connect the External Clock (optional)
Step 13
• Connect the Alarms
Step 14
•
Connect the MP Connection
Step 15
• Connect the LAN1/2 Ports
Step 16
•
Verify EMI Compliance
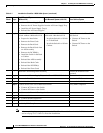
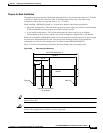
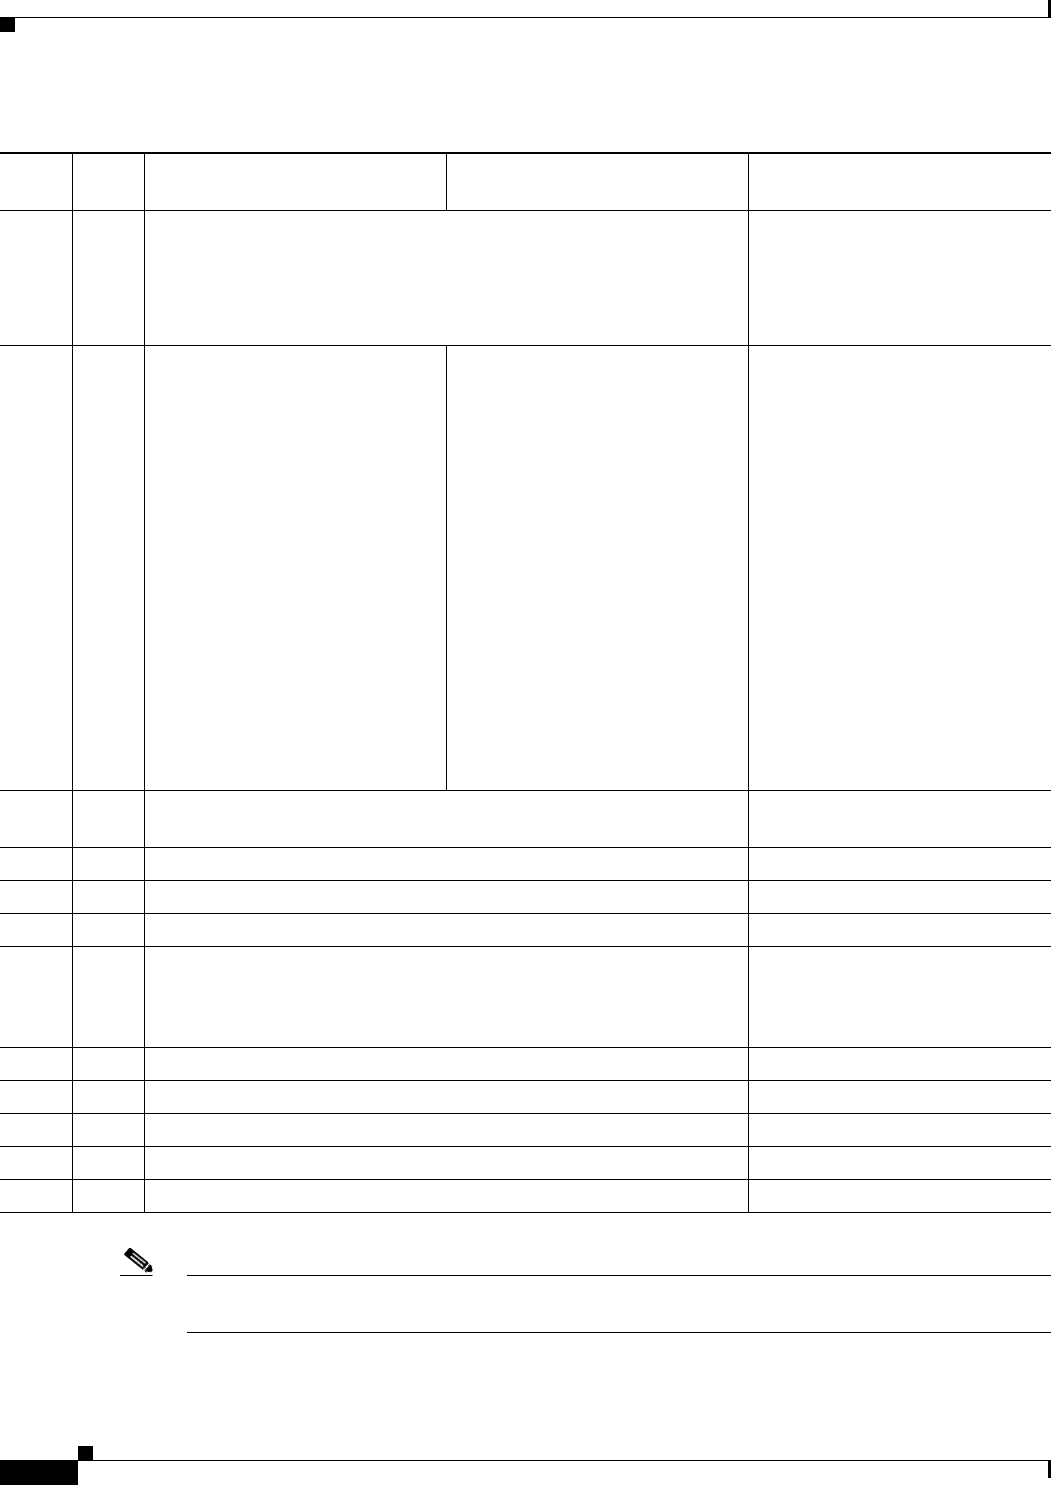
Table 5-7 Installation Checklist—MGX 8830 System (continued)
Check Steps
Rack-Mounted System
(Without Lift) Rack-Mounted System (with Lift) Cisco Cabinet System