


5-138
Cisco MGX 8800/8900 Series Hardware Installation Guide
Releases 2 - 5.2, Part Number OL-4545-01, Rev. H0, May 2006
Chapter 5 Installing the Cisco MGX Switch or Gateway
First Time Power On Procedure for MGX Switches
General Power On Sequence and Checkout
The general procedure includes these steps:
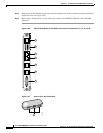
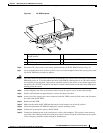
1. Install the MGX chassis (if required).
2. Ensure no cards are in the chassis, or unseat them, so there is no electrical connection to the chassis.
3. Power on the chassis.
4. Install the primary PXM controller back cards, then front card. Check the cards’ operation.
5. Install the redundant PXM controller back cards, then front card. Check the cards’ operation.
6. Install service modules and their back cards, one at a time, and check their operation.
Specific Power On Sequence and Checkout
The specific procedure includes these steps:
Step 1 Set up the chassis with the appropriate number of power supplies, fan trays, air intake plenum, and fan
cables installed.
• Use the power calculation tables in the hardware guide or ordering tool to ensure your chassis has
the right number of power supplies.
• Your chassis might be shipped fully configured, or you might need to install the chassis and cards
using the instructions in the manual. See “Documentation” section on page xxxvii for which manual
to use.
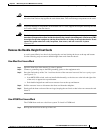
Caution Do NOT install all the service modules before you power the switch on for the first time.
Instead, it is recommended that you install one module at a time to limit the number of cards
that could be damaged if there were a problem with the chassis electronics.
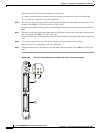
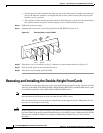
Step 2 If your chassis was shipped with cards installed, unseat or remove all cards so there is no electrical
connection between the cards and the chassis.
Step 3 Turn the chassis on at the power supply. The power supply LEDs should light. Listen for the fans
spinning up to speed.
Caution If fans do not come on, immediately power down the chassis to prevent overheating.
Caution Before handling any cards, wear a wrist strap connected to metal on the card chassis to prevent
electrostatic damage to the cards.
Step 4 Refer to Table 5-9 to confirm which type of PXM controller card is compatible with which MGX chassis,
and to confirm in which slot the PXM card(s) can be installed.
Caution This is an important step, because inserting the wrong card in the wrong slot can damage
the chassis or the card.