


6-18
Cisco ASR 1000 Series Aggregation Services Routers Hardware Installation and Initial Configuration Guide
OL-13208-03
Chapter 6 Cisco ASR 1002 Router Overview and Installation
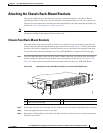
Installing the Cisco ASR 1002 Router in a Rack
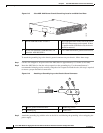
b. Insert the top screw into the second hole from the top of the rack mount ear diagonally from the
bottom screw and tighten the screw to the rack rail.
c. Insert the four screws to secure the chassis to the rack equipment.
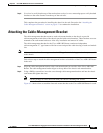
Tip As a result of using the specified rack-mount bracket ear holes, the cable-management bracket can be
easily attached to the rack-mount bracket when the chassis is in the rack.
Step 8 Tighten all screws on each side to secure the chassis to the equipment rack.
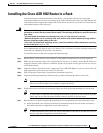
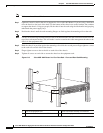
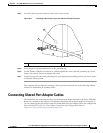
Two-Post Rack Installation
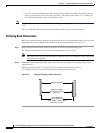
The Cisco ASR 1002 Router can be installed in a two-post rack, either 19 inch or 23 inch.
Note Inner clearance (the width between the inner sides of the two posts or rails) must be at least 19 inches
(48.26
cm). The height of the chassis is 3.47 inches (8.8 cm). Airflow through the chassis is from front
to back.
Caution If you are using a two-post rack secure the rack to the floor surface to prevent tipping and avoid bodily
injury and component damage.
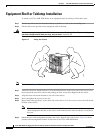
Step 1 Position the chassis so the front is closest to you and lift it carefully into the rack. To prevent injury,
avoid any sudden twists or moves.
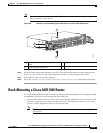
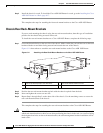
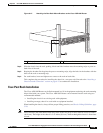
Figure 6-12 shows where to attach the rear rack-mount brackets to the Cisco ASR 1002 Router.