Removal and Installation
8-19
HP DesignJet CP Series Printers
Installation
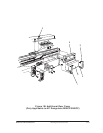
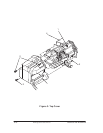
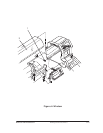
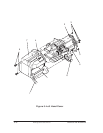
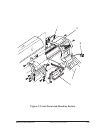
1. Open the door on the left hand cover (item 1).
2. Ensuring the cover sensor cable (item 5) is not trapped, install the left
hand cover (item 7) into the correct position on the chassis.
3. Install three T-15 screws (item 6), securing the left hand cover to the left
hand side chassis.
4. Install the cover sensor (item 5) onto the left hand trim assembly (item
2) by pushing it onto the retaining clips.
5. Install the left hand trim assembly in position, making sure the cover
sensor cable is not trapped
6. Install four T-15 screws (item 3) and one T-20 screw (item 4) securing the
left hand trim assembly.
7. Close the door of the left hand cover.
8. Install the following:
1. Window and Top Cover ' page 8-15.
9. Install the ink delivery system (Refer to the User Guide).
10.Connect the power cord and turn the printer on in service mode.
11. Perform D08 Sensors Service Test ' page 4-20


