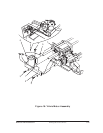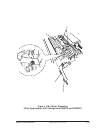
8-55
Removal and Installation
HP DesignJet CP Series Printers
Refill Assembly
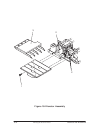
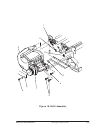
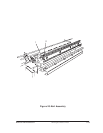
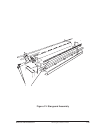
Refer to figure 19 ' page 8-57
Removal
WARNING
Switch off the printer and remove the power cord.
1. Remove the following:
1. Window and Top Cover page ' 8-15.
2. Left Hand Cover ' page 8-18.
2. Disconnect the following cables from the refill interconnect PCA (item 1):
1. Valve sensor cable in position J4 VALVE SENSOR
2. Door Sensor cable in position J6 DOOR SW
3. Refill Sensor Cable in position J3 REFILL SENSOR
3. Remove the cables from two cable clamps (item 2) on the left hand side
chassis.
4. Carefully disconnect from the refill stepper motor the refill stepper
motor cable (item 3).
5. Remove the cable clamp securing the cables to the Y-axis bracket.
6. Loosen fully the three T-20 screws (item 4) from the refill assembly.
7. Remove the T-20 screw (item 5) at the end of the metal rod securing it to
the Y-axis bracket (item 6).
8. Remove the refill assembly (item 7).


