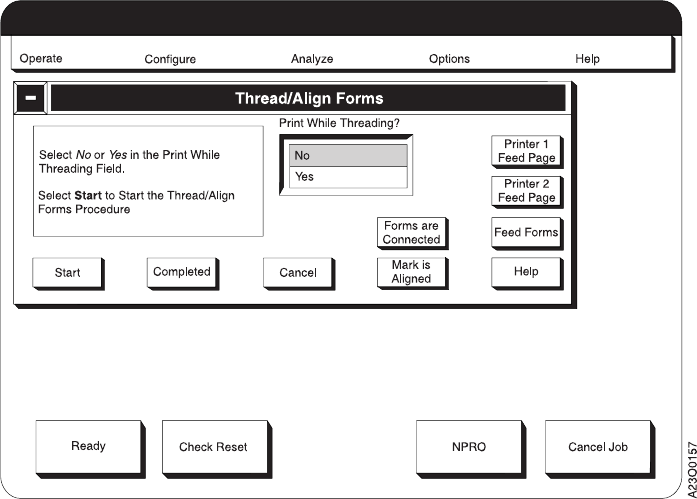
Threading Without Printing
1. SELECT the No option within the Print While Threading? field.
2. SELECT the Start pushbutton.
3. SELECT the Forms are Connected pushbutton.
4. SELECT the Feed to Align pushbutton on the Thread/Align Forms window.
a. This prints a solid alignment mark after the leading edge on a page in
Printer 1, which is designated as an alignment page.
A one-bar or two-bar pattern is also printed on the alignment page. The bar
shows whether Side 1 or Side 2 of the form is being printed on Printer 1.
This prints a dashed alignment mark after the leading edge of the page.
b. This feeds a fixed length of forms through both Printer 1 and Printer 2.
The fixed length is based on the “Length of Forms Between Transfer Points”
configuration item length that is shown on the Configure Printer window
under the Configure pull-down menu. It is a multiple of the current loaded
Form Name page length that is closest to the “Length of Forms Between
Transfer Points” length without exceeding it.
5. Visually verify that the dashed alignment mark that is printed on Printer 1 is
aligned to the appropriate alignment mark on the input station on Printer 2.
a. If the alignment mark is aligned at Printer 2, check to see if there is a
sufficient buffer loop of forms between Printer 1 and the Buffer/Flipper
Unit. If the buffer loop needs to be increased, change the “Length of Forms
Between Transfer Points” printer configuration item. See the table item on
page 223 for more information.
b. If the Printer 1 alignment mark is short of the alignment mark in Printer 2,
SELECT the Printer 2 Feed Page pushbutton on Printer 2 as many times as
necessary until the Printer 1 alignment mark is aligned at Printer 2.
c. If the Printer 1 alignment mark is past the alignment mark in printer 2, first
add some more buffer loop between Printer 1 and the Buffer/Flipper Unit
by SELECTING the Printer 1 Feed Page pushbutton several times. Then
SELECT the Cancel pushbutton on the window.
Chapter 6. Operator Responsibilities 155
|
|
|
|
|
