2. If Paper Overlay is set to YES, when loading cut-sheet paper into the printer,
hold the paper firmly in place until it is fed into the printer.
To change or check the Paper Overlay value:
1. Ensure the printer is powered off (O).
2. Press and hold Menu/Enter while powering on (|) the printer.
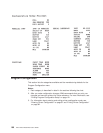
3. After start-up is complete, release Menu/Enter and the message PRINT OUT=NO
displays.
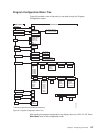
4. Press ↓ until the message FUNCTIONS displays.
5. Press → until the message FRONT TEAR=xxxx displays, where xxxx can be NORM,
AUTO,orNO.
6. Press ↓ until the message PAPER OVERLY=xxx displays, where xxx can be NO or
YES. If you want to select a value other than the one displayed, press ← or →.
7. To exit from Power On Configuration, press Menu/Enter. Your new value is
stored in NVM and the printer becomes
ready
.
8. If a continuous form is present in the forms path, press Tear, tear off at output
and park the form.
9. Press Path until the indicators for Manual Sheet Feed and the desired
continuous forms path light.
Sequence
This parameter defines the automatic loading sequence. When forms are depleted
from the primary forms path, the printer automatically loads forms from the alternate
path.
None (default)
Defines the automatic loading sequence as disabled.
This setting is used when the printer is set for dual push, but has
different forms loaded in the front push and rear push paths.
FR+RR Defines automatic forms loading from the Front Push forms path
and then the Rear Push forms path.
This setting is used when the printer is set for dual push with the
same forms loaded in the front push and rear push paths.
ASF1+2 Defines the automatic forms loading sequence for the ASF from
tray 1 and then tray 2.
ASF123 Defines the automatic forms loading sequence for the ASF from
tray 1, tray 2, then tray 3.
To change or check the Sequence value:
1. Ensure the printer is powered off (O).
2. Press and hold Menu/Enter while powering on (|) the printer. The message
STARTING UP displays.
3. After start-up is complete, release Menu/Enter and the message PRINT OUT=NO
displays.
4. Press ↓ until the message FUNCTIONS displays.
5. Press → until the message FRONT TEAR=xxxx displays, where xxxx can be NORM,
AUTO,orNO.
Chapter 4. Configuring Your Printer 101


