


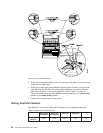
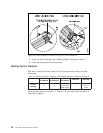
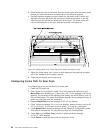

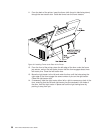
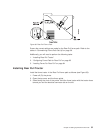

3. Stand facing the front of the printer. Hold the forms tractor with the tractor doors
toward you, and the electrical connector tab on the left pointing down.
4. Use both hands to support the forms tractor by the tractor shaft. Position the
electrical connector tab above the rear tractor electrical connector on the left
side of the printer and the two lowest pins on the right. The forms tractor will
rest on the lowest pin on the right, and lock onto the next higher pin.
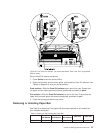
5. Adjust the forms tractor until it clicks on both sides and the electrical connector
tab is fully seated in the connector receiver.
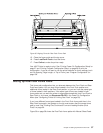
6. Close the forms guide and the top cover.
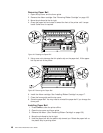
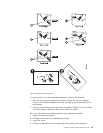
Configuring Forms Path for Rear Push
To configure the printer for the Rear Push forms path:
1. Power off (O) the printer.
2. Enter Power On Configuration mode. To do this, press and continue to hold
Menu/Enter while powering on (|) the printer, until (1) the message STARTING UP
appears, (2) the boxes on the operator panel display are solidly filled in, and (3)
the printhead stops. This takes about fifteen seconds. Do not release this key or
press any other keys until this completes.
3. Release Menu/Enter and the message PRINT OUT=NO displays.
4. Press ↓ and the message PULL=xxxxxxxxx displays, where xxxxxxxxx can be NO,
YES,orPUSH+PULL. If xxxxxxxxx is not NO, press ← or → until NO is displayed.
5. Press Menu/Enter to save the settings and exit Power On Configuration mode.
This takes a few seconds. Do not press any keys until this completes.
6. Press Path until the Rear Push indicator is blinking and the message
01 END OF FORMS displays.
7. Press Online to quiet the alarm and put the printer online.
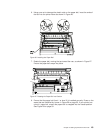
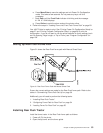
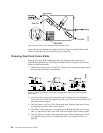
Figure 32. Installing Rear Push Tractor. Paper bail shown removed for clarity.
54 4247 Printer Model A00 User’s Guide