


Perforation Safety
You can set perforation safety to either of the following values:
No (default) The printhead is not parked all the way to the right of the print line
while the perforation of the form is passing through the mylar
opening.
Yes The printhead is parked all the way to the right of the print line so
that the perforation of the form can advance through the mylar
without the printhead touching the form. This setting is
recommended for thick multiple-part forms.
To change or check the Perforation Safety value:
1. Press Menu/Enter. The message PRINT OUT=NO displays.
2. Press ↓ until the message PERF SAFE=xxx displays, where xxx can be NO or YES.
If you want to select a value other than the one displayed, press ← or →.
3. To exit from Program Configuration, press ↓ until the message STORE=QUIT
displays. If you want to exit without saving the new value, press Menu/Enter.
If you want to save the new value, press ← or → to select either STORE=SAVE (new
value is stored in NVM) or STORE=CURRENT (new value remains valid until the
printer is powered off (O)). Press Menu/Enter to save the new value.
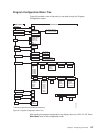
Adjustments
This category contains the following parameters:
v Automatic Forms Thickness (AFTA)
v Horizontal
v Vertical
Automatic Forms Thickness (AFTA)
This adjustment allows you to set the distance or gap between either the printhead
and the forms or the printhead and the platen. The Automatic Forms Thickness
Adjustment can be set to one of the following ranges:
-5 to +3 (0=default)
Sets the gap between the printhead and the forms. Each increment
equals 0.03 mm (0.0012 in.). The default setting of 0 corresponds
to a gap of 0.15 mm (0.006 in.).
Fixed 0 to 8 Sets the gap between the printhead and the platen to a fixed
distance. When a fixed value is selected, the printer will maintain
that dimension regardless of the thickness of the forms. Each
increment of 0.5 corresponds to 0.05 mm (0.002 in.) and is added
to the default gap of 0.15 mm (0.006 in.). Select this choice for
forms like labels with varying thicknesses. The default value is 0.
To change or check the AFTA:
1. Press Menu/Enter. The message PRINT OUT=NO displays.
2. Press ↓ until the message ADJUSTMENTS displays.
3. Press → and the message AFTA=xx or FIXED AFTA=x displays, where xx can be
-5 to +3 or x can be 0 to 8. If you want to select a value other than the one
displayed, press ← or →.
Chapter 4. Configuring Your Printer 111