


LGB5128A User Manual
158
3-22 802.3ah OAM
For Carrier Ethernet applications, you can reduce operating costs and increase the remote
access for maintenance. Using Ethernet as a metropolitan and wide-area networking
technology requires a new set of OAM protocols. Service provider networks are large and
complex with a wide user base, and they often involve different operators that must work
together to provide end-to-end services to enterprise customers. While enterprise end-
customer demands continue to increase, so do the requirements for service provider Ethernet
networks, particularly in the areas of availability and mean time to repair (MTTR). Ethernet
OAM addresses these challenges and more, thereby directly impacting the competitiveness
of the service provider. Ethernet has been used as a LAN technology for many years, and
enterprises have managed these networks effectively, Ethernet OAM is a broad topic, but
here we will focus on three main areas of Ethernet OAM that are most in need by service
providers and are rapidly evolving in the standards bodies: Service Layer OAM (IEEE
802.1ag Connectivity Fault Management), Link Layer OAM (IEEE 802.3ah OAM), and
Ethernet Local Management Interface (MEF-16 E-LMI). Each of these different OAM
protocols has unique objectives and complements the others. IEEE 802.1ag Connectivity
Fault Management provides “service” management.
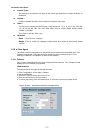
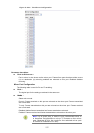
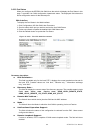
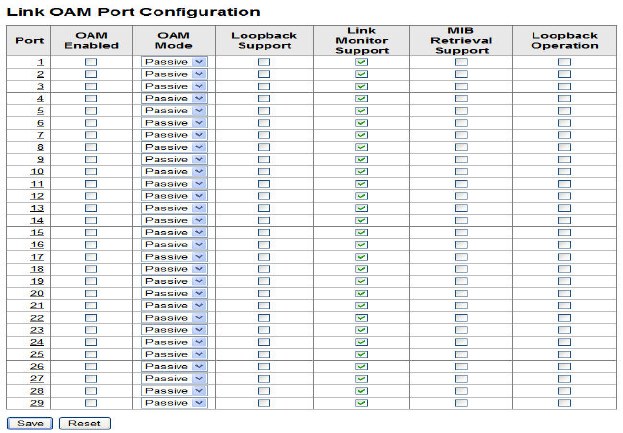
3-22.1 Port Config
This chapter explains how to inspect and change the current Link OAM port configurations. It
will help users understand the Port configuration parameter that you need to set when you
enable IEEE802.3ah OAM function on the switch.
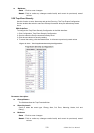
Web Interface
To configure the 802.3ah OAM in the Web interface:
1. Click Configuration, 802.3ah OAM then Port config.
2. Select the Port that will enable OAM function.
3. Scroll to select OAM mode with Passive or Active.
4. Select the port that will support Loopback, Link monitor, MIB Retrieval, or Loopback
operation.
4. Click the save button to save the setting
5. To cancel the setting, click the Reset button. It will revert to previously saved values
.
Figure 3- 22.1: The Link OAM Port Configuration