


47
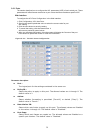
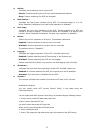
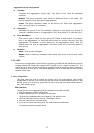
Aggregation Group Configuration
Locality :
Indicates the aggregation group type. This field is only valid for stackable
switches.
Global: The group members may reside on different units in the stack. The
device supports two 8-port global aggregations.
Local: The group members reside on the same unit. Each local aggregation
may consist of up to 16 members.
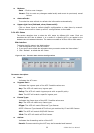
Group ID :
Indicates the group ID for the settings contained in the same row. Group ID
“Normal” indicates there is no aggregation. Only one group ID is valid per port.
Port Members :
Each switch port is listed for each group ID. Select a radio button to include a
port in an aggregation, or clear the radio button to remove the port from the
aggregation. By default, no ports belong to any aggregation group. Only full
duplex ports can join an aggregation and ports must be in the same speed in
each group.
Buttons
Save—Click to save changes.
Reset—Click to undo any changes made locally and revert to previously saved
values.
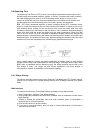
3-3.2 LACP
Ports using Link Aggregation Control Protocol (according to IEEE 802.3ad specification) as their
trunking method can choose their unique LACP GroupID to form a logical “trunked port.” The
benefit of using LACP is that a port makes an agreement with its peer port before it becomes a
ready member of a “trunk group” (also called aggregator). LACP is safer than the other trunking
method—static trunk.
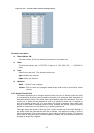
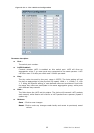
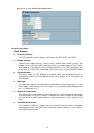
3-3.2.1 Configuration
This page allows the user to inspect the current LACP port configurations, and possibly
change them as well. An LACP trunk group with more than one ready member-ports is a “real
trunked” group. An LACP trunk group with only one or less than one ready member-ports is
not a “real trunked” group.
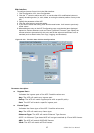
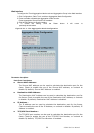
Web Interface
To configure the Trunk Aggregation LACP parameters in the Web interface:
1. Click Configuration, LACP, Configuration.
2. Enable or disable the LACP on the port of the switch.
Scroll the Key parameter with Auto or Specific. The default is Auto.
3. Scroll the Role with Active or Passive. The default is Active.
4. Click the save button to save the setting.
5. If you want to cancel the setting, then you need to click the reset button.
It will revert to previously saved values.