


Report Creation Wizard
140 NN44400-710 Contact Center Performance Management 12 November 2010
If the report spans more than one page, the first page of the report is numbered as 1+.
Until you reach the last page of the report, you do not know how many pages the report
contains. After the next page of the report appears, the numbering changes, for
example, to 1 of 2+, and then to 1 of 3+, until the last page of the report appears. On the
last page, the numbering changes to 1 of x, where x equals the total number of pages.
For example, if the report is four pages, the numbering on the last page is 1 of 4.
Prerequisites
• Select fields.
• Save the report.
Procedure steps
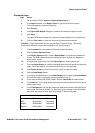
Step Action
1 On the toolbar, click the Preview.
Report Viewer appears.
--End--
Importing a report to Historical Reporting
Before you can run and schedule a Report Creation Wizard report in Contact Center
Manager Administration, you must save and import the report to Historical Reporting.
You can use the Import tool to import a Report Creation Wizard report into a standard
group or into your private folder. After you import a Report Creation Wizard report, the
system identifies automatically the supported data ranges (Interval, Daily, Weekly, and
Monthly) during the import procedure.
You can import Report Creation Wizard reports to Contact Center Manager Servers
only.
Unlike user-imported reports, you need not synchronize Report Creation Wizard
reports. After you import a Report Creation Wizard report, you can edit the report directly
through Report Creation Wizard. After you save the report, all changes are effective
immediately.
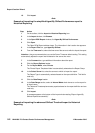
The procedure to import advanced (ODBC) reports is similar to simplified reports,
except for the following:
• You must manually enter the supported data ranges for each table referenced on
the report.
• You must specify the report type. Three available report types exist: Historical,
Configuration, and Networking.