


NN44400-710 Contact Center Performance Management 12 November 2010 81
Historical Reporting
Creating a shared or private report
You can create custom reports if you change existing public, shared, or private report
templates to suit your needs. Save them in your Group or Private Report Templates
folders. When you save a report in your Group folder, you save a shared report; that is,
you share the report with other users who have access to your Group folder.
If you do not want to use an existing report as the basis for your custom report, you must
create a new report in the Crystal Reports application and import it into the Contact
Center Manager Administration Historical Reporting application. See Importing a report
(page 84).
Prerequisites
• Ensure that you have access to the folder that contains the report to use.
• If you schedule the report, activate the schedule. See Activating a scheduled report
(page 92)
.
• Log on to Historical Reporting. See Logging on to Historical Reporting (page 74).
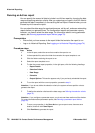
Procedure steps
Step Action
1 In the left pane, select the server on which to create the report.
2 Navigate to the folder that contains the report template to use.
3 Click the report to change.
4 In the right pane, click the following headings:
• Selection criteria.
•Data range (not applicable for configuration reports)
• Schedule
5 Click Report Details.
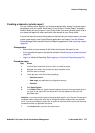
6 In the Report Title box, type the name to appear at the top of the generated report. If
you type no new report title, the default title in this box appears at the top of the
generated report.
Attention: If you save multiple copies of the same public report in your Group or Private report
templates folders, change the report title to distinguish between reports when you generate
them. If you do not change the report title, all copies of the same public report have the same
standard title when you generate the reports.
7 In the Save As box, type the new report name.