


04_NetworkingClientSoftware.fm Modified: 8/7/02
Template Version 1.0
GL-1020 Operator’s Guide (Basic) 35
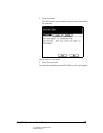
w Enter a destination directory or accept the default loca-
tion.
w Select the drivers and fonts to install.
w Enter the network path to the printer or the queue name.
w Select a program group or accept the default.
3 When the setup program finishes copying the necessary files
to your computer, it prompts to view the Readme file and
launch GL-DocMon. Deselect either or both options, if
desired, then click
Finish to exit the Setup Wizard.
Note: Only the Windows
®
98/Me operating system
automatically creates the printer port. If you are using the
Windows NT
®
, Windows
®
2000 or Windows
®
XP
operating system, you must manually create the printer
port after installing the printer drivers.
Uninstalling Client Software
1 If open, close the GL-DocMon application.
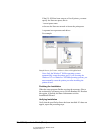
2 Insert the TOSHIBA e-STUDIO GL-1020 Client CD-ROM
into the CD-ROM drive. If Auto-Run is enabled, the
InstallShield Setup Wizard starts automatically.
Otherwise, choose
Run from the Start Menu and then locate
the Setup.exe file on the CD-ROM. Click
OK to launch the
setup program.
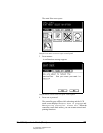
The setup program automatically detects previously installed
versions and opens the Client Setup Maintenance Program.
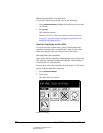
3 Select
Remove to uninstall all previously installed GL-1020
components from the client workstation.
4 Follow the setup wizard to remove files from the workstation.
Click
Finish to exit the setup program.
The workstation may require rebooting before all
components, such as the program items from the Windows
®
Start menu, are removed.