


02_ContInstallClient.fm Modified: 8/7/02
Template Version 1.0
40 GL-1020 Operator’s Guide (Basic)
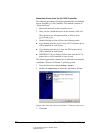
If the installation program detects a previous version of the
software, it opens the GL-1020 Client Setup Maintenance
Program.
4 If upgrading your software, click
Remove to delete all
previously installed components.
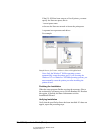
5 Follow the on-screen instructions to complete installation.
The next topic explains the installation options.
Click
Next on each screen to continue. To cancel installation,
click
Cancel.
6 When installation is complete, restart the computer.
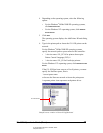
Installation Options
The installation program prompts you to:
n Accept the license agreement.
n Choose a destination location or accept the default folder.
If you select a different file folder the directory name must
conform to the MS-DOS
®
operating system naming
conventions. The file name can have a maximum of eight
characters, and it must have a three-character extension.
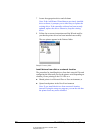
n Select the type of setup: Typical, Complete or Custom.
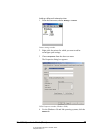
n Select components:
TOSHIBA GL-DocMon
TOSHIBA e-STUDIO550-810 GL-PCL6
TOSHIBA e-STUDIO550-810 GL-PSL3
TOSHIBA e-STUDIO550-810 GL TWAIN Driver
AGFA Font Manager and Font collection
n Select the port
In this step you connect the TOSHIBA GL-1020 to your local
printer port. The port names to connect to are:
w \\<device name>\DSSC for printers that require either
Printer Control Language (PCL) 6 or PostScript
w \\<device name>\GL_PCL6 for printers that require
Printer Control Language (PCL) 6
w \\<device name>\GL_PS for PostScript printers