


02_ContInstallMac.fm Modified: 8/7/02
Template Version 1.0
70 GL-1020 Operator’s Guide (Basic)
INSTALLING MACINTOSH PPD FILES
The TOSHIBA Macintosh PPD (PostScript Printer Description)
file contains information about controller-specific features. It
works in conjunction with the standard Macintosh LaserWriter 8
printer driver version 8.6.5 (or higher).
Considerations and Limitations
n The Macintosh PPD file will be compressed in the StuffIt
format if the software version is prior to 1.3. It will
automatically decompress when it is copied to the
System
Folder: Extensions: Printer Descriptions
folder, providing the
StuffIt program is installed on the workstation.
n The controller supports both LPR and AppleTalk printing
from Macintosh systems.
n You can enable Macintosh printing from the LCD Touch
Screen or by using TopAccess.
n If you will be using LPR/LPD printing, you must enable LPD
printing from TopAccess as well.
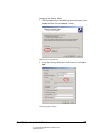
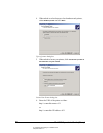
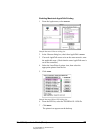
Copy the TOSHIBA PPD file to the Client Workstation
1 Insert the e-STUDIO GL-1020 Client CD-ROM into the
drive.
2 Double-click the boot drive icon.
The System Folder opens.
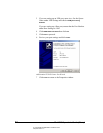
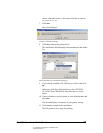
3 Find the
Extensions folder and double-click to open it.
4In the
Extensions folder, find the Printer Descriptions folder
and double-click to open it.
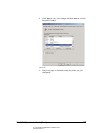
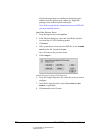
5 If the PPD file is not compressed, go to step 7. Otherwise,
drag the Stuffit file
TOSHIBA_GL-1020.sit from the CD-ROM
to the desktop.
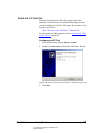
6 To extract the Macintosh PPD file, you must have the Stuffit
utility on the workstation. If it is installed, double-click the
stuffed file icon on the desktop to open it.
7 Select and drag the
TOSHIBA GL-1020.PPD file to the Printer
Descriptions folder.
Note: The procedure described here refers to StuffIt 5.5. For
procedures to decompress files using earlier Stuffit versions,
refer to your StuffIt documentation.