


EPSON Stylus Pro 7600/9600 Revision A
Disassembly & Assembly Disassembly and Assembly of Paper Feed Mechanism 190
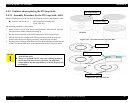
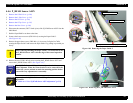
4.4.5 P_THICK Sensor/P_THICK Sensor_0.3 ASSY
P_THICK Sensor ASSY
P_THICK_0.3 Sensor ASSY
1.
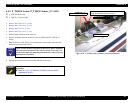
Remove the R Side Cover. (p.160)
2.
Remove the L Side Cover. (p.163)
3.
Remove the I/H Cover. (p.164)
4.
Remove the H Top Cover. (p.165)
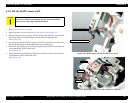
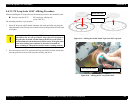
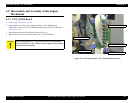
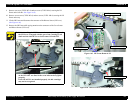
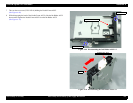
5. Push the paper hold lever down to the rear.
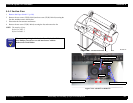
6. Remove the harness from the connector of the P_THICK Sensor/P_THICK_0.3
Sensor.
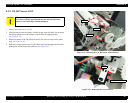
7. Remove the one (CUPS: M3
×
6) screw securing the sensor bracket and remove the
bracket along with the both sensors.
8. Unhook the sensor from the sensor bracket and remove the sensor.
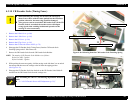
Figure 4-59. P_THICK and P_THICK_0.3 Sensors Removal
C H E C K
P O I N T
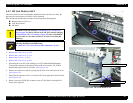
Sensor bracket position is adjusted at the factory before shipment.
When the sensor bracket is to be removed on the service site, you
are advised to mark the mounting position before removal for easy
adjustment at reassembly.
A D J U S T M E N T
R E Q U I R E D
If you move the sensor bracket position, perform the necessary
adjustment.
Refer to “5.1.4.7 P_THICK/P_THICK_0.3 Sensor ASSY
Adjustment” (p.215)
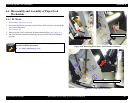
Bring the Paper Set Lever into the release position and
bring down the Detection Arm rearward.
P_THICK Sensor ASSY
P_THICK_0.3 Sensor ASSY
Screws (M4×8) ×2