


EPSON Stylus Pro 7600/9600 Revision A
Product Description Operating Panel 60
1.4.3.32 Power cleaning
With this mode, the printer has more power cleaning than normal cleaning.
1.4.3.33 Cutter Blade Replacement
Selecting this mode allows the user to replace the cutter blade.
The procedure for cutter blade replacement is as follows:
1. Select the cutter replacement menus from the panel. (The cutter replacement menu
can be selected by pressing the SelecType button for 5 sec.)
2. Open the cover following cover open guide.
3. Replace the cutter blade following cutter replacement guide.
4. Close the cover following cover close guide.
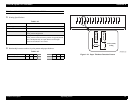
1.4.3.34 Gap Adjustment (Bi-D Adjustment, Uni-D Adjustment)
Selecting this mode allows the user to adjust Bi-D and Uni-D depending on paper
thickness.
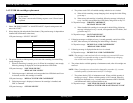
Setting
1. Set the paper.
2. Select the gap adjustment menu from the panel.
3. Set to 'STD' for 0.2mm or 1.2mm EPSON paper. When other paper is set
individually, set thickness in units of 0.1mm.
4. Select the adjustment pattern to be printed (Bi-D Black, Bi-D all or Uni-D
individual), and print. (“PRINTING ALGNMNT PATTERN” is displayed.)
5. Check the printed adjustment patterns and enter the number of the pattern
with the least displacement for each adjustment item.
6. Repeat (4)~(5) until adjustment of all items is completed.
NOTE: For details of patterns, refer to “Gap Adjustment Print Pattern (TBD) (p.
63)”.
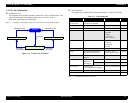
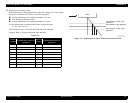
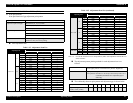
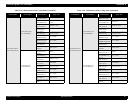
Adjustment
The adjustment values set above are saved in NVRAM as 4 types of adjustment
value depending on PG height (0.7mm/1.2mm/2.2mm/2.6mm). To calculate
adjustment value, PG height and paper thickness are necessary. Saving place of
adjustment value is selected as following list. Adjustment value saved in NVRAM
is updated when the value is adjusted again;