


EPSON Stylus Pro 7600/9600 Revision A
Adjustment Overview 217
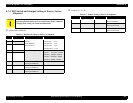
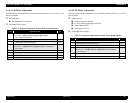
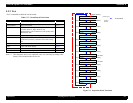
5.1.4.11 Cutter Solenoid ASSY or Paper Guide L Adjustment
Described below are the adjustment items to be made once the Cutter Solenoid (p.177)
has been replaced or the Paper Guide L has been reinstalled.
Adjusting tools:
Cutter Positioning Jig #F800
Scale 1000mm #F713
Scale Stopper #F714
Adjustment items (steps):
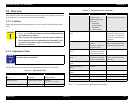
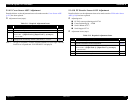
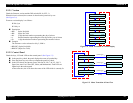
5.1.4.12 Damper ASSY Adjustment
Described below are the adjustment items to be made once the Damper ASSY (p.173)
has been replaced.
Adjustment items (steps):
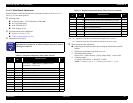
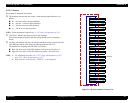
5.1.4.13 Release Sensor (I/H Lever) Adjustment
No adjustment is required
5.1.4.14 Battery
No adjustment is required. Execute “Initialize RTC (p.83)”.
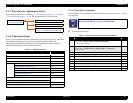
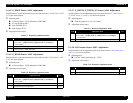
Table 5-13. Required Adjustment Items
Step Adjustment Item See
<Mechanism Adjustment>
1 Cutter Positioning Adjustment p.269
2 Checking for Proper Cutting and Cutter Position p.271
<Start the Self-diagnostic Function>
(Power OFF →
[Paper Feed
∆
]
+
[Paper Feed
∇
]+[Cut/Eject]
→ Power ON)
p.220
3 Checking for Proper Cutting Pressure
4 Feed Correction + T&B Adjustment p.239
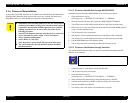
C H E C K
P O I N T
Execute ink discharge (“Ink Blowing”) before removing the
Damper ASSY.
Refer to “5.2.3.20 Clean Head (p.256)”.
Secure the coupling screw and the ink tube by tightening at the
specified torque. (2 ∼ 2.5 kg/f)
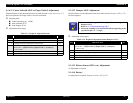
Table 5-14. Required Adjustment Items (Damper ASSY)
Step Adjustment Item See
<Start the Self-diagnostic Function>
(Power OFF →
[Paper Feed
∆
]
+
[Paper Feed
∇
]+[Cut/Eject]
→ Power ON)
p.220
1 Including initial filling p.259
2 Head Nozzle Checking (Cleaning) p.237
3 Leak check pattern printing p.259
4 Test Pattern Printing p.255