166
Basics
1
Click the [Environment] button in the Main Window to select [Translation
Environment Settings] and click your desired translation environment name
in the displayed list.
The [Detail Settings] dialog box appears.
2
In the [Dictionary Settings] tab, select the common dictionary indicated with
the green icon ( ) for which you want to change the administrator.
⇒ You cannot change the administrator of the common dictionary which is set in the
[Dictionaries Used in Translation] box. If the common dictionary you want to change is set in
the [Dictionaries Used in Translation] box, click the [<< Don't Use] button to move the
common dictionary to the [List of Available Dictionaries] box.
3
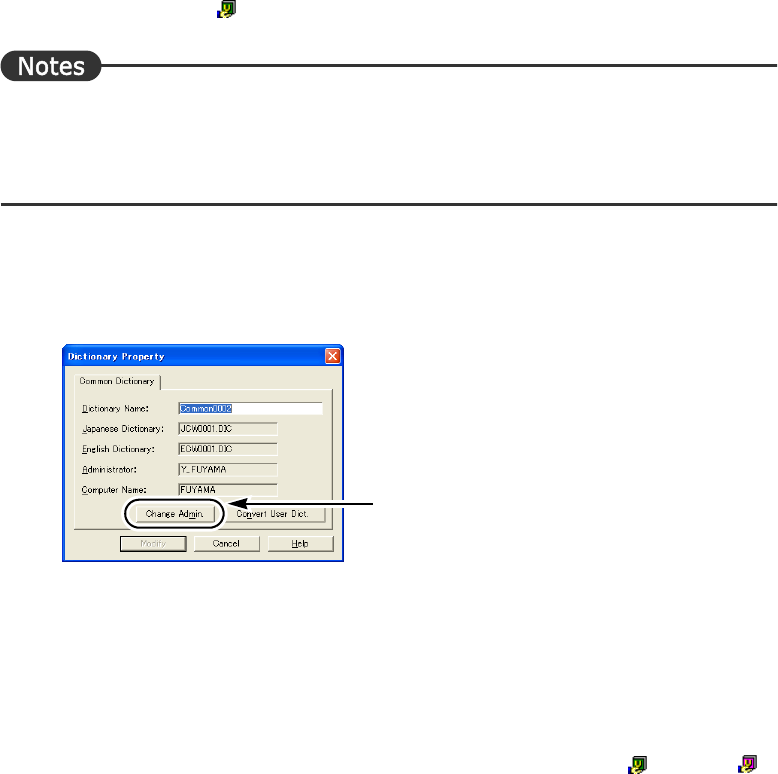
Click the [Property] button.
4
Click the [Change Admin.] button.
5
Confirm the message and click the [Yes] button.
6
Click the [Modify] button.
When the common dictionary upload processing confirmation dialog box appears,
always click the [Yes] button.
The current administrator of the common dictionary is cleared and the screen returns to
the [Dictionary Settings] tab of the [Detail Settings] dialog box.
At this time, the icon of the common dictionary changes from green ( ) to pink ( ).
7
Click the [OK] button of the [Detail Settings] dialog box.
A dialog box appears asking you to confirm saving.
To overwrite the current translation environment, click [Save] and the [OK] button.
To save it as a new translation environment, click [Save as], enter an environment name
in the [Environment Name] box and click the [OK] button.
■ Obtaining administrator rights (performed by a new administrator)
This section explains how to obtain administrator rights for a common dictionary for which
administrator rights have not yet been set.
Click
