


Chapter 2 NAS Head 2-37
At the CLI, enter “fsck <volumename>”. You will then be prompted whether repairs
should be made if errors are found. Generally, the answer should be “y” for “yes”.
The other potentially useful option is “n” for “no”. This will run a check against the
volume without writing the repairs. As noted above, this can be used to make
decisions about running the filesystem check.
If errors are reported by the filesystem check, the filesystem check must be repeated
until there are no errors. This may require several runs of the filesystem check. In
this case, the following message is displayed:
sfs2ck vol1: no errors
It is also possible, but very rare, that the above message will never be seen. This can
occur in extreme cases where the filesystem check is unable to completely repair a
volume. In these cases, the volume should be deleted and restored from tape.
Another rare possibility is that the filesystem check can fail and either hang or
reboot. In this case, proceed according to the instructions under the heading “System
hang or reboot during normal operation” above, and escalate the issue immediately.
If repairs were made by the filesystem check, file and directory names are sometimes
lost. These files are issued a name that begins with “Node”, followed by numbers
related to the inode location in the filesystem. This number is generally not useful,
other than to ensure a unique filename. These files and directories retain their
original contents, to the extent possible. Manual inspection of these files is required
to determine the original file type and filesystem location.
2.7.2 StorEdge Network Capture Utility
Sun StorEdge 5310 NAS includes a built-in network monitoring tool. This allows you
to capture packets from the network and save them to a file. This can be a valuable
troubleshooting tool.
To configure network monitoring, it must first be loaded at the StorEdge CLI.
To access the StorEdge CLI:
1. Connect to the StorEdge via Telnet or serial console, and type admin at the [menu]
prompt and enter the administrator password.
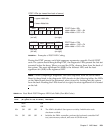
2. At the CLI, enter load netm.
3. Then type menu to configure capture and capture packets.
4. Press the spacebar until “Packet Capture” is displayed under “Extensions” at the
lower right.
5. Select the letter corresponding to “Packet Capture”.