


Configuring Communication
113
VG-Series Modero Touch Panels
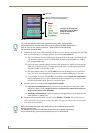
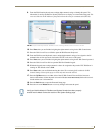
10. Click the OnLine Tree tab in the Workspace window to view the devices on the Virtual System.
The default System value is one.
11. Right-click on the Empty Device Tree/System entry and select Refresh System to re-populate the
list.
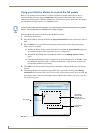
12. Power-up your panel and press and hold the grey Front Setup Access button (for 3 seconds) to
continue with the setup process and proceed to the Setup page.
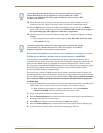
13. Select Protected Setup > System Settings (located on the lower-left) to open the System Settings
page (FIG. 86).
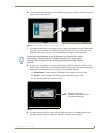
14. Press the blue Type field (from the Master Connection section) until the choice cycles to the word
Ethernet. ICSNet communication cannot be used on either 1200V-Series or VG-Series panels.
15. Press the Mode field until the choice cycles to the word URL.
By selecting URL, the System Number field becomes read-only (grey) because the panel pulls
this value directly from the communicating target Master (virtual or not). A Virtual Master
system value can be set within the active AMX software applications such as: NetLinx Studio,
TPD4, or IREdit.
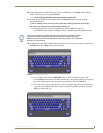
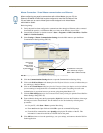
16. Press the Master IP/URL field to open a Keyboard and enter the IP Address of the PC used as the
Virtual Master.
17. Click Done to accept the new value and return to the System Settings page.
18. Do not alter the Master Port Number value (this is the default value used by NetLinx).
19. Press the Back button to open the Protected Setup page.
20. Press the on-screen Reboot button to both save any changes and restart the panel.
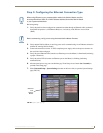
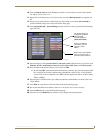
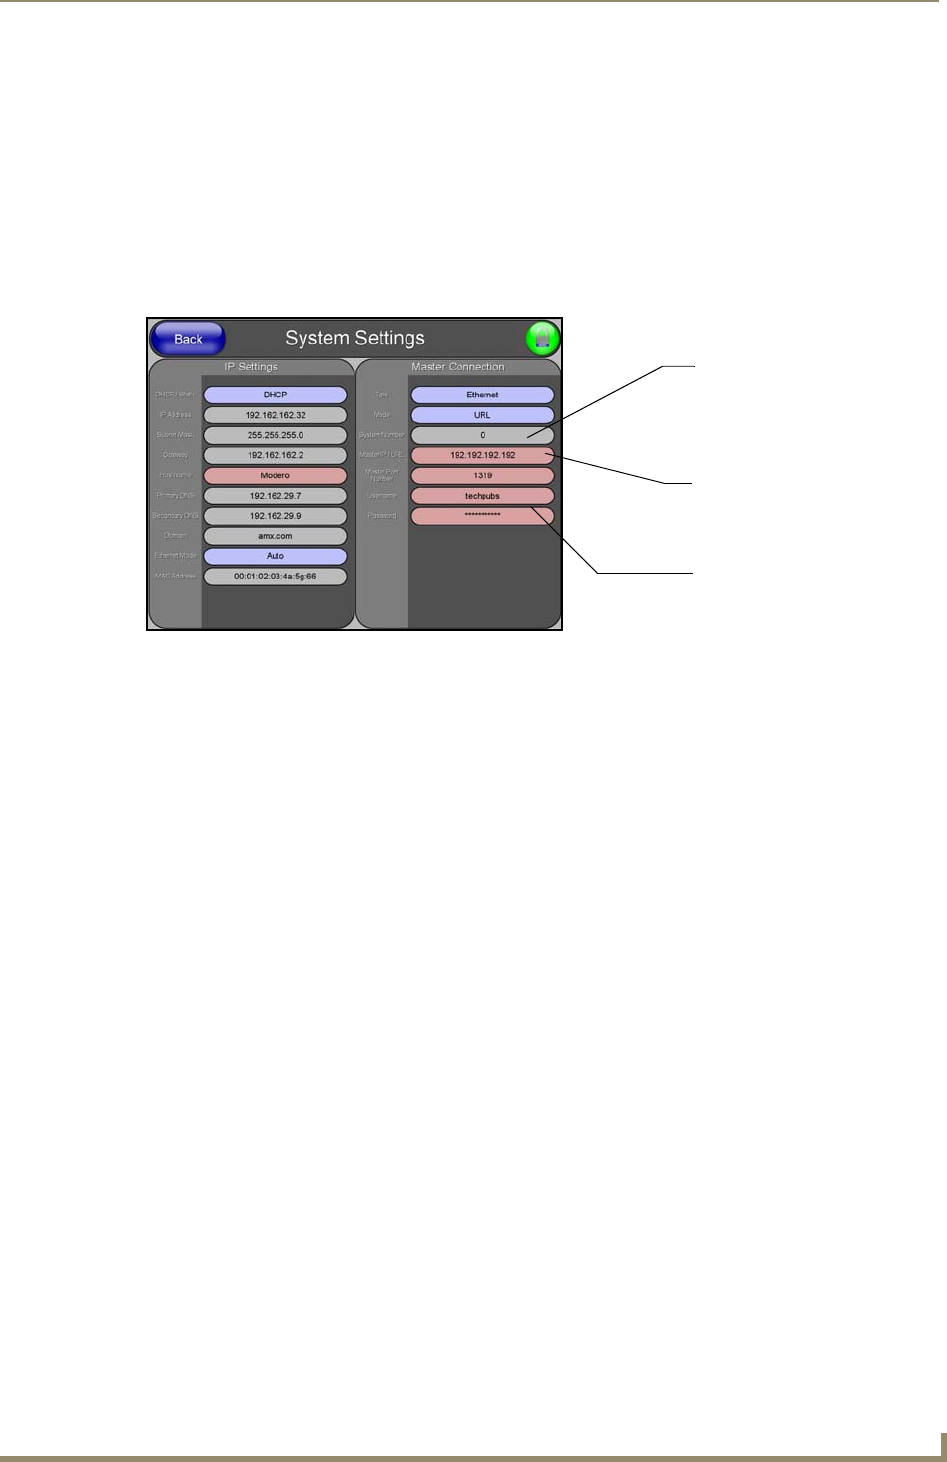
FIG. 86 Sample System Settings page (for Virtual Master communication)
Enter the IP Address
information of the PC
used as a Virtual
Master
The System Number is
assigned to the Master
within the AMX
software application
(these must match)
When using a Virtual Master,
there is no need to enter a
username and/or password