


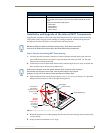
Touch Panel Accessories
30
VG-Series Modero Touch Panels
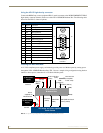
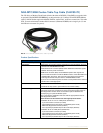
The following table provides the wiring information for each of the four (4) available connectors on each
side of the NXA-MTC/RGB Tabletop Cable.
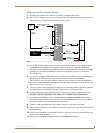
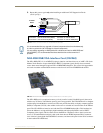
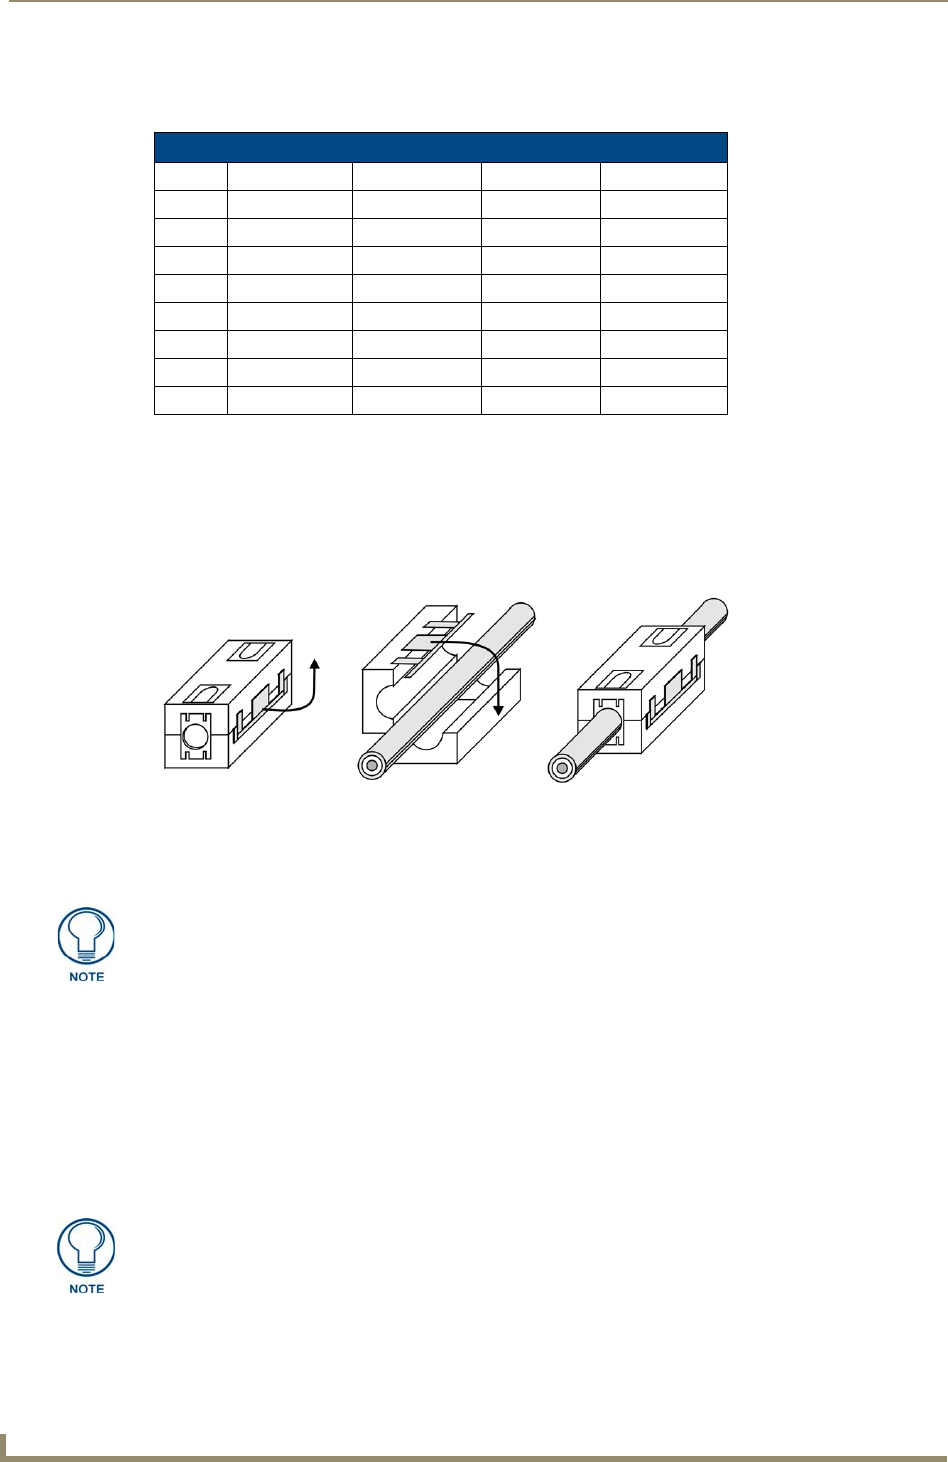
Installing CAT5 Suppression Ferrites
Before connecting the RJ-45 cables to the Modero Touch Panel, install the necessary number of CAT5
Suppression Ferrites (FIG. 10) to the RJ-45 Audio/Video cable. These ferrites come as part of the
Installation Kits mentioned in the previous Specification table (page 28).
No tools are required for this installation.
1. The CAT5 Suppression Ferrite is housed within a plastic enclosure (shown in FIG. 10) with a latch
release on one side. Pull to release the latch and open the enclosure.
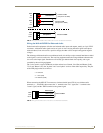
2. Grasp the Black RJ-45 Audio/Video cable being connected to the panel. This end of the cable is
longer than the opposing end which connects to the breakout box (6 inches vs 3 inches).
Refer to FIG. 11 for more detailed information.
3. Insert the panel-end of the Black RJ-45 Audio/Video cable into the groove along the inside of the
enclosure.
4. Snap the enclosure shut with the cable inside, and you’re done.
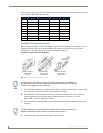
Wire Table
Wire Connector 1 Connector 2 Connector 3 Connector 4
1 White/Orange White/Orange Red White/Orange
2 Orange/White Orange/White Black Orange/White
3 White/Green White/Green - White/Green
4 Blue/White Blue/White - Blue/White
5 White/Blue White/Blue - White/Blue
6 Green/White Green/White - Green/White
7 White/Brown White/Brown - White/Brown
8 Brown/White Brown/White - Brown/White
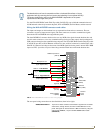
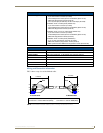
FIG. 10
Installing the CAT5 Suppression Ferrites
Release the latch to
open the plastic
enclosure.
Insert the CAT5
cable and close
the enclosure.
Push down on the
enclosure until it
snaps closed.
All 1200V-Series, VG-Series, and Table Top CV10 panels require the installation of
an appropriate number of CAT5 Suppression Ferrites when they use an RJ-45 cable
to feed an A/V signal from the breakout box.
The CAT5 Suppression Ferrites MUST be installed onto the cable connected to the
Modero’s Audio/Video RJ-45 connector (just behind the connector).