


1. Use and to select SETUPoAdmin MenuoFax SettingsoLine Type. Select PBX, and then press .
2. Use and to select SETUPoAdmin MenuoFax SettingsoPrefix Dial. Select On, and then press .
3. Use and to select SETUPoAdmin MenuoFax SettingsoPrefix Dial Num. Enter a maximum of five-digit prefix number from 0-9, *, and #.
Advanced Fax Settings
If you are experiencing fax send or receive errors, there is an advanced fax settings menu which you can access and change the settings accordingly.
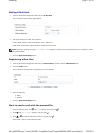
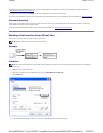
To enter the Diagnostic Menu (Customer Mode), follow the instructions.
1. Turn off the Dell MFP Laser 3115cn.
2. Disconnect all network, phone line, USB and Parallel cables from the device.
3. Turn on the Dell MFP Laser 3115cn while holding down the and button. The Customer Mode menu appears.
4. After all the advanced fax settings have been made, you will need to turn off and on the Dell MFP Laser 3115cn for the new settings to be effective.
Error Correction Mode (ECM)
Some of the legacy fax devices do not support the Error Correction Mode. You may experience fax send or receive errors due to this feature. You can
disable the ECM with the following instructions.
1. When the printer is in Customer Mode, select Fax/Scanner Diag and press button.
2. Press the button until Parameter appears, then press the button.
3. Press the button until FAX Parameter appears, then press the button.
DRPD
Pattern
Before using the Distinctive Ring Pattern Detection (DRPD) option, distinctive ring service must be installed on your telephone line by the
telephone company. After the telephone company has provided a separate number for faxing with a distinctive ring pattern, configure the
fax setup to monitor for that specific ring pattern.
Forward
Settings
You can set your multifunction printer to forward incoming faxes to another fax number during a specified time period. When a fax arrives
at your multifunction printer, it is stored in the memory. Then, the multifunction printer dials the fax number that you have specified and
sends the fax.
Select Trans. at Error to forward the incoming faxes when an error occurs.
Select Trans. Always to always forward the incoming faxes.
Select Not Trans. not to forward incoming faxes. You can set the fax number to which faxes are forwarded. Then, you can enter the
start time and/or the end time. The Print Local Copy option allows you to set the multifunction printer to print the fax, if fax forwarding is
completed with no error.
Fwd.
Settings
Num
You can set the number of the multifunction printer to always forward all of the incoming faxes to the specified destination.
Fwd. Set
Print
Prints all of the ongoing faxes when you can set the multifunction printer to always forward the faxes to the specified destination.
Prefix Dial You can select whether or not to add the prefix number when you send a fax.
Prefix Dial
Num
You can set a prefix dial number up to five digits. This number dials before any auto dial number is started. It is useful for accessing the
PABX exchange.
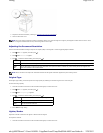
Discard Size When receiving a document as long as or longer than the paper installed in your multifunction printer, you can set the multifunction
printer to discard any excess at the bottom of the page. If the received page is outside the margin you set, it will print on two sheets of
paper at the actual size. When the document is within the margin and the Auto Reduction feature is turned on, the multifunction printer
reduces the document to fit it onto the appropriate sized paper and discard does not occur. If the Auto Reduction feature is turned off or
fails, the data within the margin will be discarded.
Color Fax Set whether the multifunction printer sends and receives color faxes.
Extel Hook
Thresh
You can set the threshold value for the OnHook mode.
Country You can select the country where the multifunction printer is used.
Fwd. Error
Print
Prints the document failed to transfer when Forward Set Print is set to Off.
NOTE: Prefix Dial only supports the environment where you send a fax to send a fax to the external line number. To use Prefix Dial, you must do the
following from the operator panel.
NOTE: The advanced fax settings are only meant for advanced users. Incorrect settings on the Dell 3115cn may damage the device.
Page
6
of
20
Faxing
2/
29/
2012
mk:@MSITStore:C:\Users\14JMIS~1\AppData\Local\Temp\Rar$DIa0.409\UsersGuide.ch
...