Index
Chapter 5 Various Ways to Scan
Appendix
Glossary
Introduction
Contents
TOP
112
How to Load
Documents
Daily Care
Troubleshooting
Operational
Settings
Replacing
Consumables
Scanner
Overview
Various Ways
to Scan
Configuring
the Scan
Settings
How to Use
the Operator
Panel
Detecting Multifeed Errors
Multifeed is an error when two or more sheets overlap and are
fed through the ADF at once. It is also called a “multifeed”
when a difference in document length is detected.
You can set the scanner to detect multifeeds and display an
error message.
Also, a window in which you can check the multifeed images
can be displayed.
Settings for multifeed detection can be configured in the
scanner driver or the Software Operation Panel.
For information on how to configure by the Software Operation
Panel, refer to "Specifying a multifeed detection method
[Multifeed]" (page 207).
1 Load documents on the hopper.
For information on how to load documents, refer to "Chapter 2 How to
Load Documents" (page 33).
2 Start up ScandAll PRO and open the [TWAIN Driver (32)]
dialog box.
For information on how to display the [TWAIN Driver (32)] dialog box,
refer to "How to Use ScandAll PRO".
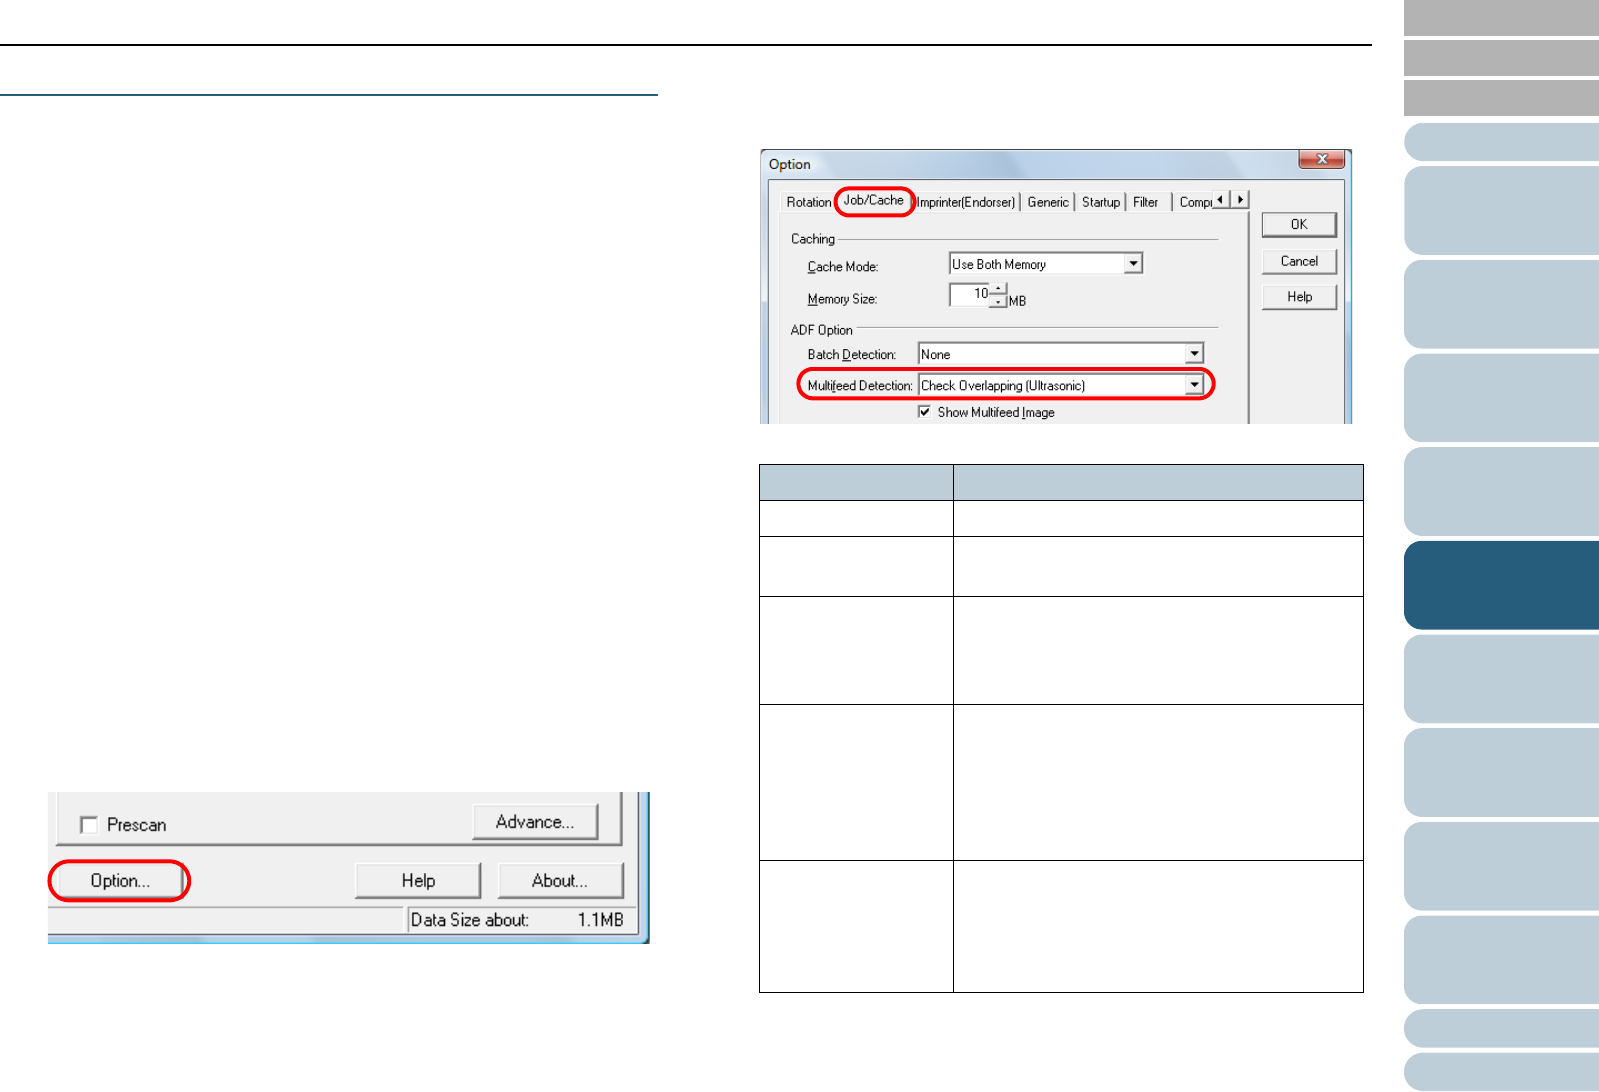
3 Click the [Option] button.
D The [Option] dialog box appears.
4 Click the [Job/Cache] tab and specify the detection
method in the [Multifeed Detection] drop-down list under
[ADF Option].
The following are the conditions of detecting multifeeds.
For more details about multifeed detection, refer to "Conditions for
Multifeed Detection" (page 44).
Condition Description
None Does not detect multifeed.
Panel setting Enables the setting of the Software
Operation Panel.
Check Overlapping
(Ultrasonic)
Uses the ultrasonic sensors inside the ADF
to monitor the documents during feeding
and to identify multifeeds according to the
deviation of the reflected ultrasonic waves.
Check Length Monitors the document length during
feeding, and identifies multifeeds according
to the deviation of detected lengths. Note
that multifeed cannot be detected
accurately when scanning a mixed batch (of
different sizes) or a Job Separation Sheet.
Check Overlapping
and Length
Monitors both document overlapping and
length to detect multifeeds.
Note that multifeed cannot be detected
accurately when scanning a mixed batch (in
different sizes) or a Job Separation Sheet.
